When I first started making my own cheese from milk kefir, I never dreamed that I would one day be able to make my own feta. More solid cheeses, like this milk kefir cheese in the manner of a feta, is not a ferment for absolute beginners, but still doable. It's well worth taking a chance on the project, and I hope this tutorial helps you along the way.
Unlike other cheeses, you need a cheese mold for this semi-solid cheese. I don't like it, but it's a fact that the most common and easiest to use molds are made of plastic. I recommend you to start with 2-3 molds of different sizes, preferably with corresponding press lids. If you can get hold of a used mold, great! Then you don't have to buy one.
Make your own feta from milk kefir cream cheese
The basis for this super delicious shepherd's cheese is, as with all my cheeses, very simple, homemade milk kefir. When starting the kefir, I make sure to place it as warm as possible to steer it already specifically in the direction of cheese. Temperatures of 20 to 28 °C cause the bacteria to ferment lactic acid, and due to the higher lactic acid content, the whey separates more easily from the curd. Cheese making is so much easier.
Of course, you can also make cheese from cool fermented kefir. In that case it will not separate as clearly and will be less acidic in taste.
INGREDIENTS
For a cheese of about 200-250 grams you need
- 1 liter milk *
- 1 tbsp milk kefir grains
- approx. 170 g salt for the rub and for the brine
- herbs, flowers or spices **
- 1 muslin cloth
- 1 bowl
- 1 strainer
- 1 cheese mold with press lid
- Pressing weights
* as unprocessed as possible, that is, pasteurized at most. Not homogenized, no prolonged shelf life, and in no case UHT milk. Optimal is raw milk, if you can get it.
** optional
PREPARATION
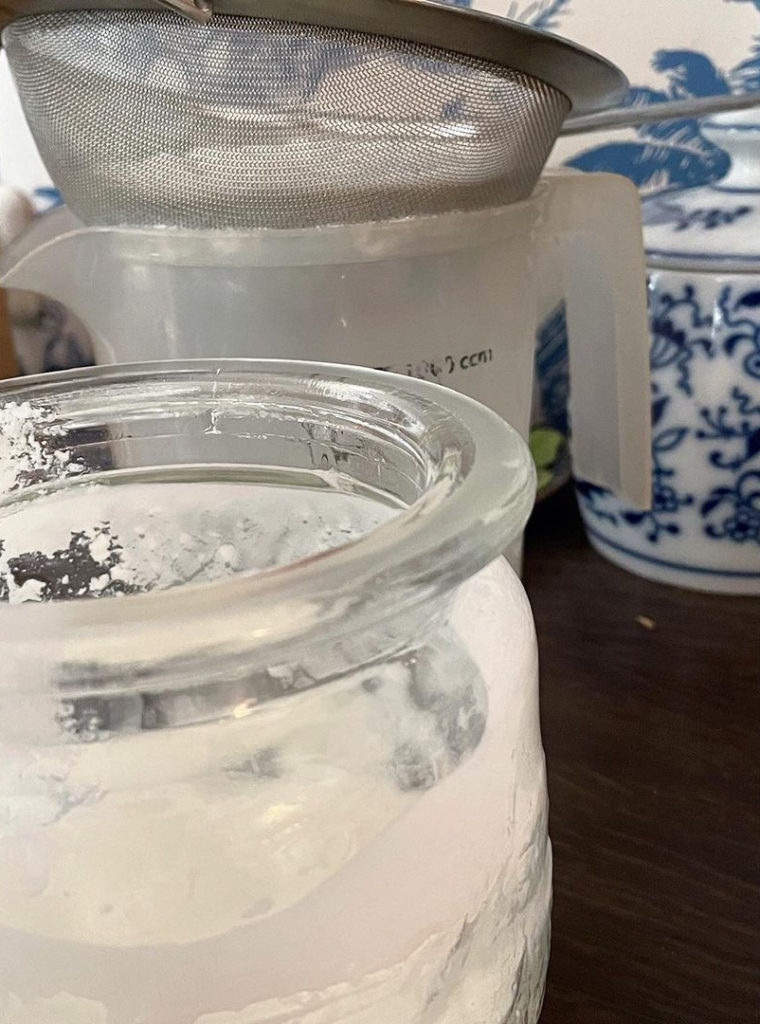
First you make milk kefir from the milk and the kefir grains. For this cheese, you leave the grains in the milk for two days before you fish them out. The easiest way to do this is to strain all the kefir through a sieve and, if it's already very thick, to carefully pass it through with a spoon. The grains are either immediately put back to wrok in a new batch of milk, or kept in some milk in the refrigerator until the next use.
Strain milk kefir grains
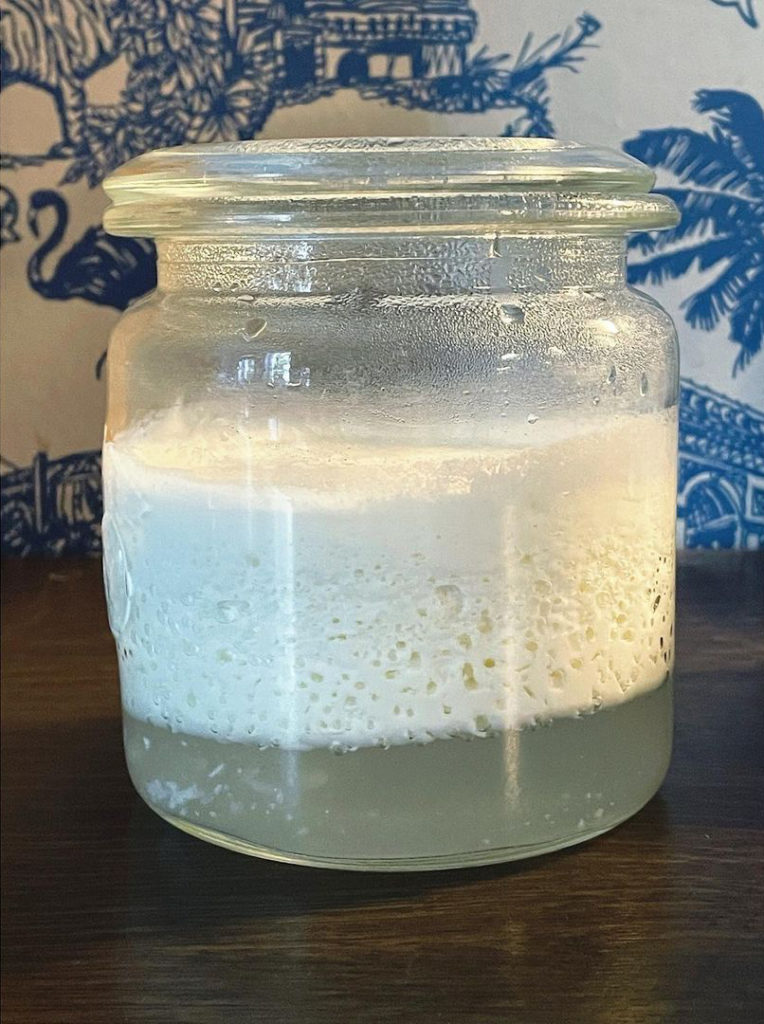
Let the strained milk kefir sit until the curds and whey separate clearly. Carefully remove the curd from the top with a skimmer or ladle to mix the two products curd and whey as little as possible. Pour the whey into a container and store it covered in the refrigerator; it will be needed later. I like to use fliptop bottles for this.
Drain the curds
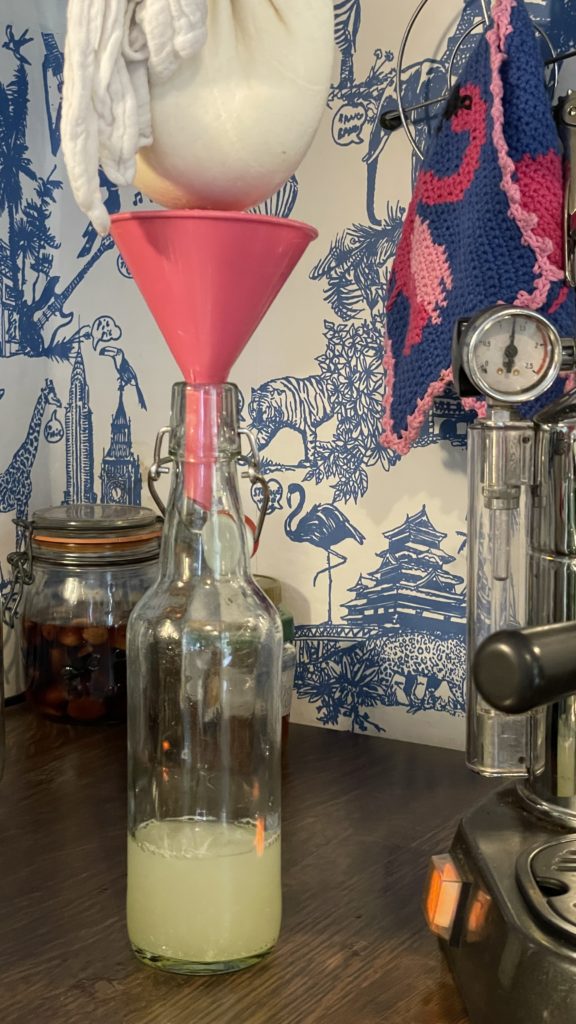
The curd must now drain to lose even more whey. For this you need the muslin cloth. Water and wring out the cloth, it should be slightly damp, and place it in a strainer over a bowl. Carefully skim off the curds as explained above, knot the muslin cloth, and hang it over the bowl to drain. Or place it directly above a bottle, and you'll save yourself the trouble of transferring the whey. This whey should also be saved, please! A suitable place for the draining process is on a butcher's hook on the door handle of a kitchen upper cabinet.
Rotate the drying kefir in the cloth every 12 hours to allow more whey to drain. Although as much whey as possible should drip off, the curd is still not salted in the cloth, as one would do, for example, for Labneh-style cream cheese.
Press the cream cheese
At this stage, the cheese is a delicious dry cream cheese. However, we want to make our own feta-style shepherd's cheese, so the cheese needs to be pressed. You can either put the cheese directly into the cheese mold, or place a damp muslin cloth in the mold beforehand, which is folded over the cheese. Anyway, the pressing lid is placed on top of the cheese. If you have a mold without a lid, you must find something that covers the cheese horizontally in the mold. On this lid the weights are placed now, the more, the firmer the cheese will be. It should be at least 1 - 1.5 kg for a very small cheese.

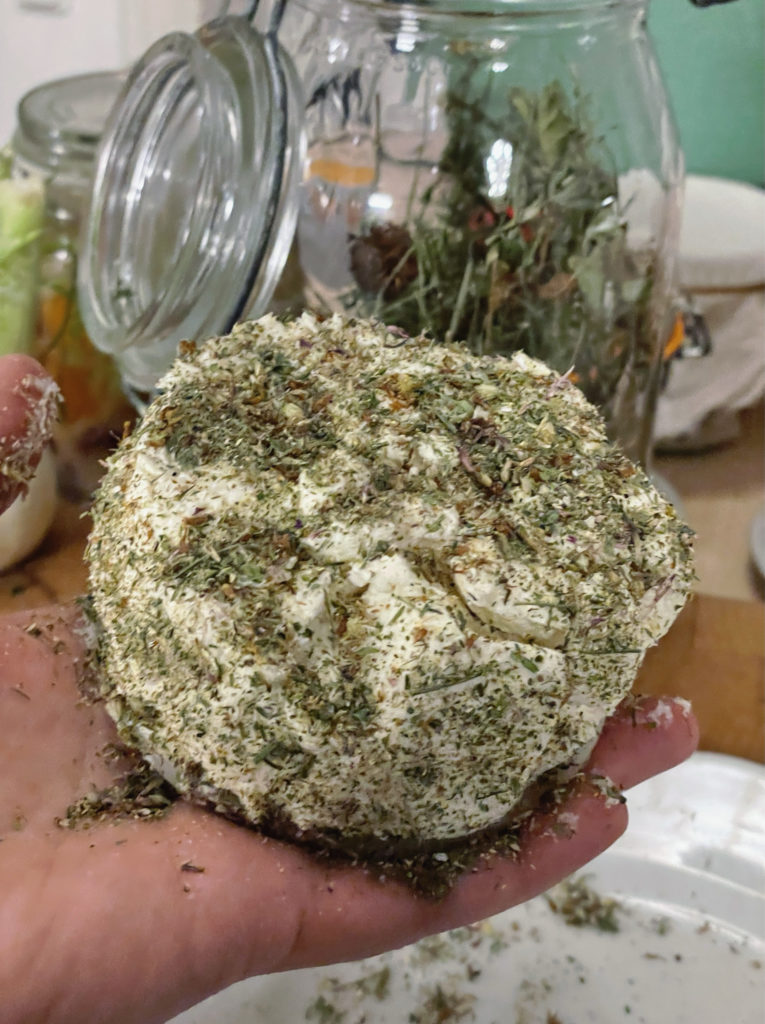
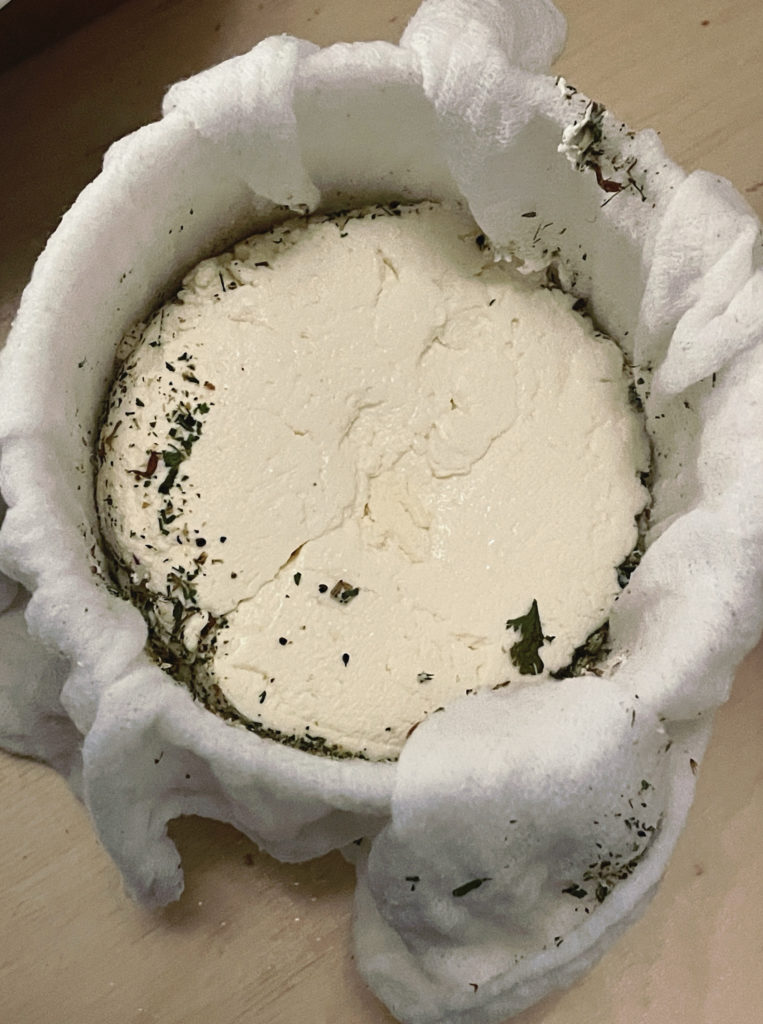
If you want to coat the shepherd's cheese with flowers or herbs, do so before pressing it into the cheese mold. With the gauze cloth the rind holds together better.
Weights for cheese making
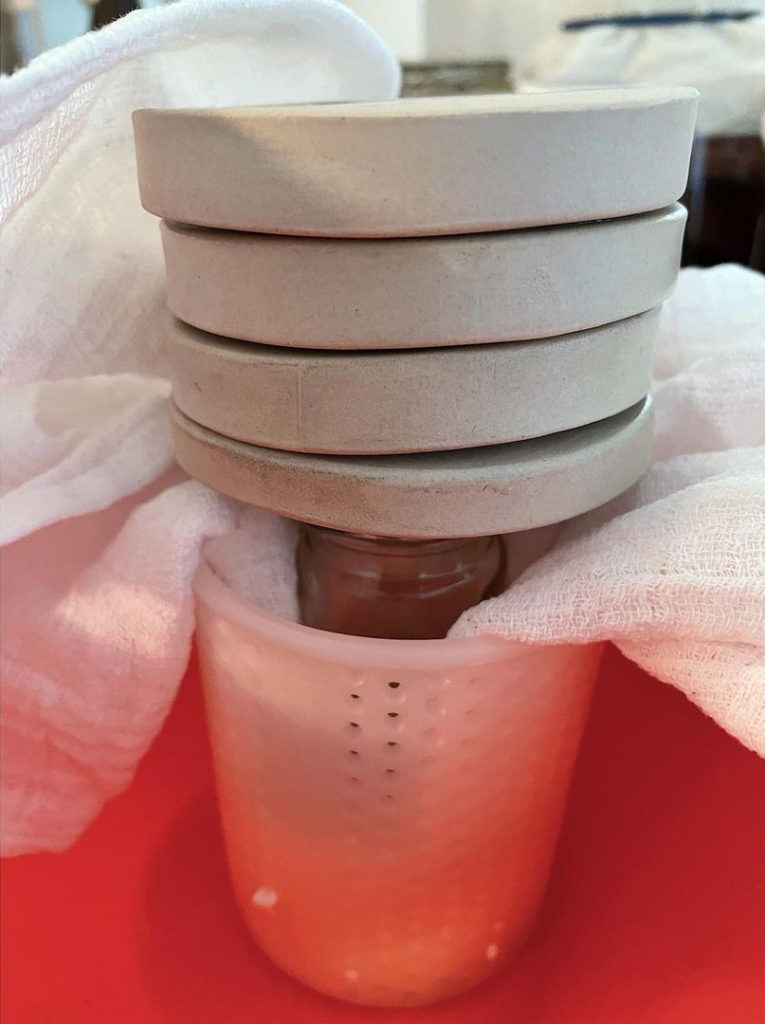
As a fermentista, you may already have a weight or two in the house that you can use. I have some heavy clay weights that I use for shibazuke or miso. They are also great for cheese. If you're making a small cheese in a small mold, you may need an adapter for the weights because they won't fit in the mold. For this you can instrumentalize smaller glasses, be it an old screw-top glass or a shot glass. The weights can be placed on top.
What also works very well and probably each of you already has in the house, is a bottle. I additionally drape it with the teenager’s dumbbells. That works fabulously and makes for great conversation.

Turning, drying and storing your feta style shepherd's cheese
Turn the cheese in the mold 2-4 times a day so that it is pressed evenly. Remove from the mold no sooner than 24 hours, salt at 2% by weight, and let dry in a well ventilated area. For me, that's in a steamer tray in the kitchen, with a fly screen over it. Turn 2-3 times within a day and the cheese should feel dry to the touch.
The cheese is stored in a brine. For this you prepare a 6% salinity, so 60 gr. salt to a liter of liquid. The brine should also have a similar pH value as the cheese. The most suitable brine is therefore the whey produced during the cheese making process. If the whey is not enough, you can stretch it with water.

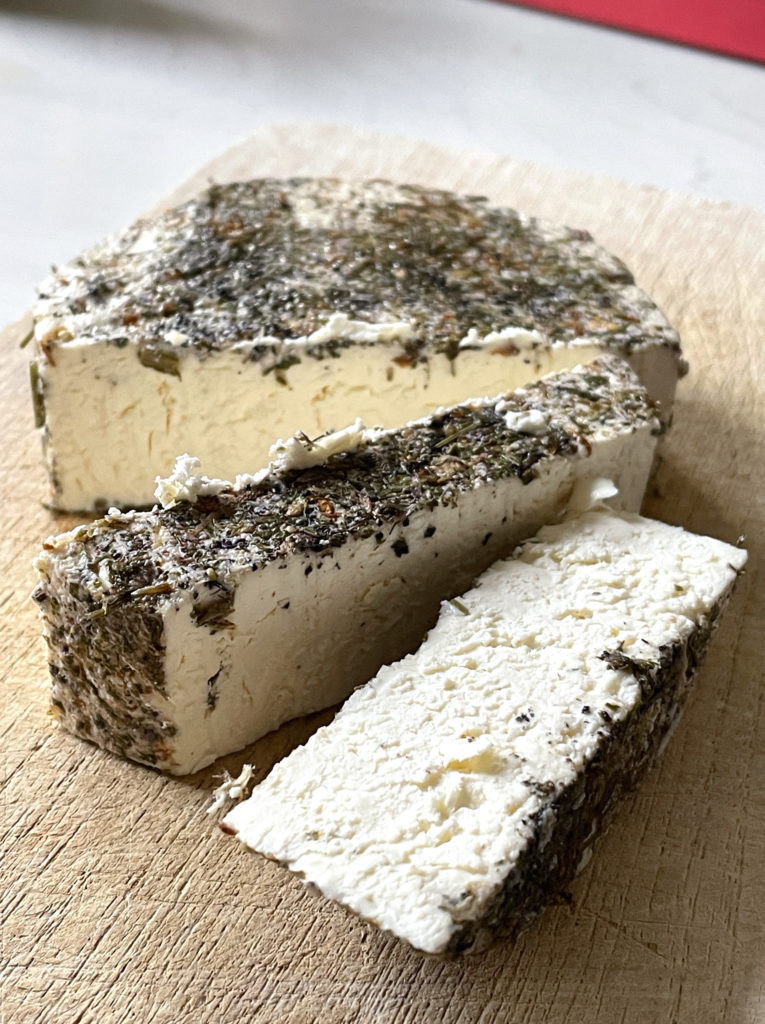

Because of the storage in brine, it is also important that your cheese was pressed properly with a lot of weight, so that it keeps its shape and does not crumble. Sometimes I add bay leaf and peppercorns or pink berries.

Hi Katsu,
Wie lange lagerst du den Käse in der Lake bis du ihn verwendest?
Grüße
Andrea
Liebe Andrea,
über Nacht und gerne etwas kühler ist eine gute Idee. Ab dann kannst Du ihn essen. Frisch geht natürlich auch, dann ist er wahrscheinlich ein bisschen krümeliger. 4 Wochen habe ich meine selbstgemachten Feta-Käse schon in der Lake im Kühlschrank gelagert, wahrscheinlich ginge sogar noch länger.
Viel Spass beim Käse machen!
Katsu
ich lebe in Spanien auf 1250 m Höhe in der Sierra Las Villas. gemässigtes Wetter im Schnitt plus heisse Sommer. mein Wunsch ist durch fermentieren noch unabhängiger zu sein. LG Doro
Liebe Doro,
das klingt machbar und nach einer sehr guten Idee. Ich hoffe, Du findest genug Hilfe und Inspirationen auf diesen Seiten.
Best regards,
Katsu
Hallo Katsu, ich als Aluhut-Träger benutze beim Milchkefir-Pilz absieben immer einen Plastik-Löffel, dann geht es viel schnelle und macht auch überhaupt nichts 😉
Danke fürs Frischkäse-Zubereiten zeigen!
Moin Katja,
es steht Dir frei, Plastik zu benutzen, wenn Du das für richtig hältst. Mir geht es hier darum, mit dem Mythos aufzuräumen, dass Milchkefir nicht mal für Sekunden mit Metall in Berührung kommen darf 😉 Dass Plastik die Knöllchen schneller siebt, als Metall, halte ich jedoch für ein Gerücht.
Liebe Grüsse!
Katsu
Hi Katsu,
hattest du es auch schon mal, dass der Milch-Kefir etwas „schleimig“ geworden ist?
Er hat nicht schlecht geschmeckt, aber die Konsistenz hat mir nicht mehr zugesagt. Werd mir frischen Pilz von meiner Mum dieses WE holen. Das Frischkäse-Rezept bringt noch eine gute Verbrauchs-Idee. Ansonsten friere ich den Pilz mal ein, wenn ich eine Pause brauche.. LG, Katja
Hej Katja,
das Phänomen kenne ich leider nicht. Ich trinke den Kefir jedoch auch selten, meistens verarbeite ich ihn zu Käse weiter. Ich höre mich aber gerne mal um, vielleicht kann jemand aus der Fermentation Love Community helfen.
Viele Grüße,
Katsu
Hallo,
kann ich Penicillium Candidum in den Frischkäse mischen und es im Kühlschrank zu einem Camembert reifen lassen? Bei veganem Käse aus Cashewkernen funktioniert das ja auch so. Ich frage mich, ob das hier auch geht.
Liebe Grüße und danke für die tollen Anleitungen!
Claudia
Hej Claudia,
das kannst Du selbstverständlich machen.
Gutes Gelingen!
Katsu
Hallo Katu,
danke für de Inspiration, jetzt muss ich nur noch ein geeignetes Gefäß aus meinem Fundus rauskamen…
Aber, was sind „Beugelbotteln“, bitte?
Wilde Grüße
Irmgard
Hej Irmgard,
dann wünsche ich gutes Gelingen! Beugelbotteln sind Bügelverschlussflaschen – manchmal rutscht mir doch immer noch ein Plattdeutscher Begriff durch’s Lektorat…
Wilde Grüsse zurück!
Katsu
ich bitte um Entschuldigung für das fehlende „s“…
Das macht doch nichts. Trotzdem danke, dass es Dir aufgefallen ist 🙂
Moin Katsu,
wie lange muss denn der Bruch im Mulltuch ungefähr am Haken abhängen bis ich ihn pressen kann?
Meiner hängt jetzt seit 24 Stunden und tropft noch immer leicht in die Schüssel. Hab schon 2 Gläser Molke zur Aufbewahrung in den Kühlschrank getan.
Liebe Grüße
Christiane
Hej Christiane,
zwei Tage sollten eigentlich ausreichen. Du kannst ihn auch ein bisschen von aussen drücken, wenn er dir noch sehr feucht erscheint.
Gutes Gelingen!
Katsu
Hallo Katsu,
vielen Dank für deine tollen Anleitungen. Kann ich für diesen Käse die Kefirknollen auch in Schafmilch ansetzen?
Liebe Grüße Angelika
Hej Angelika,
das kannst du. Das wird lecker!
Gutes Gelingen,
Katsu
Where in the preparation do I add the “ca. 170 gr. Salz zum Einreiben und für die Lake”?
Google Übersetzung:
An welcher Stelle der Zubereitung füge ich das „ca. 170 gr. Salz zum Einreiben und für die Lake“?
Hej Laurie,
you need that for the last step, the rub and the brine, as described in the paragraph: Turning, drying and storing your feta style shepherd’s cheese.
Good luck with your cheese!
Katsu
Sooo toll Katsu, danke!
Ich hab mich auch schon länger gefragt woher dieser Trubel im die Plastiklöffel kommt. Da ich gelesen habe, dass rostfreier Edelstahl ok ist und unsere Löffel zumindest sind sowieso alle rostfrei.
Mein Mann hatte sich schon lange amüsiert über mich, wenn ich hysterisch zu den Kindern gestürmt bin und ihnen den Löffel aus der Hand geworfen habe um den Kefir zu retten. ^^