Hanseatic city of Hamburg, ahoy! Hamburg black bread made from rye with oat grains is the bread of my childhood and my hometown, I grew up with it. Unfortunately, it has not been sold in bakeries for quite some time - at least not in the quality I know and expect. That's why I'm so excited that after a long search I finally succeeded and can bake my childhood bread myself at home.
I have tried quite a few recipes and adapted, until I came across the recipe for East Frisian black bread with sunflower seeds by Stefanie Herberth. You can really chase me away with sunflower seeds, though, so I replaced them with my beloved oats, also marginally twisted the other ingredients here and there and voilá! Taste and consistency fit, it became a perfect Hamburg black bread.
Sourdough bread is easily digestible
Many people have increasing problems tolerating bread. Surprisingly, however, the grains are not even the most common trigger for the intolerances! The culprit is rather the little time that is taken in the bread production. In many cases, it is the sugars in the grains that cause intestinal problems. A bread dough needs to leave for at least four hours to break these down. Longer is even better. Leaving the dough longer also improves the flavor of the bread and increases the zinc and iron content.
Rye bread made with classic sourdough is particularly healthy because it is very digestible and optimizes the utilization of nutrients. So, more time baking means more flavor, more nutrients and better digestibility.
Rye is also an excellent source of minerals like flouride, for example, and oats are the superfood amongst the grains anyway. Not only does it taste delicious and provides long-lasting satiety, it also comes with the greatest amount of protein, minerals and vitamins than any other grain.
INGREDIENTS & PREPARATION
For this Hamburg black bread you need a 1 kg loaf pan and two days time. I mill the rye myself at home, and depending on my mood it is sometimes finer, sometimes coarser. However, it should not be finer than medium-fine, then the hearty character, which makes this bread, would be lost.
Evening, Day 1
rye sour
- 300 gr. rye groats
- 300 gr. lukewarm water
- 30 gr. sourdough starter
soaker
- 100 gr. rye groats
- 200 gr. oat grains (naked oats)
- 300 gr. boiling water
- 20-23 gr. salt
Combine all the ingredients for the rye sour into a uniform dough and leave to rise at room temperature for 12-18 hours. For the soaker pour boiling water over the oat grains, salt and groats and leave to swell overnight.
If the sourdough needs more than 12 hours, it is no problem to leave the soaker for this long, too. I always prepare both in the evening, and between morning and noon the dough will then be finished. This rye bread is patient.
Morning or a.m., day 2
Dough
- 400 gr. rye groats
- 200 gr. warm water
- 60 - 80 gr. sugar beet syrup or malt syrup
- rye sour
- soaker
- oat grains, groats or rolled oats for topping
Thoroughly mix the groats with the hot water and the soaker. Then add the syrup and sourdough and knead everything for 30 minutes on a slow speed. This is called swelling kneading and causes the groats to absorb the water particularly well. The bread becomes firm and very juicy.
Let the dough rise for 45 minutes, covered with a cloth. If you take whole oat grains for sprinkling, soak them now in a little water.
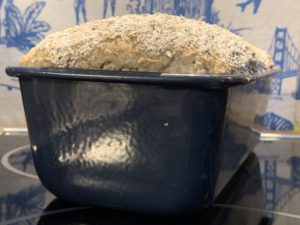
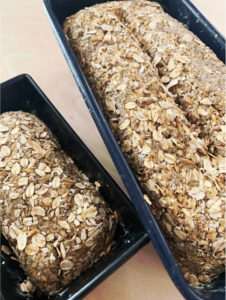
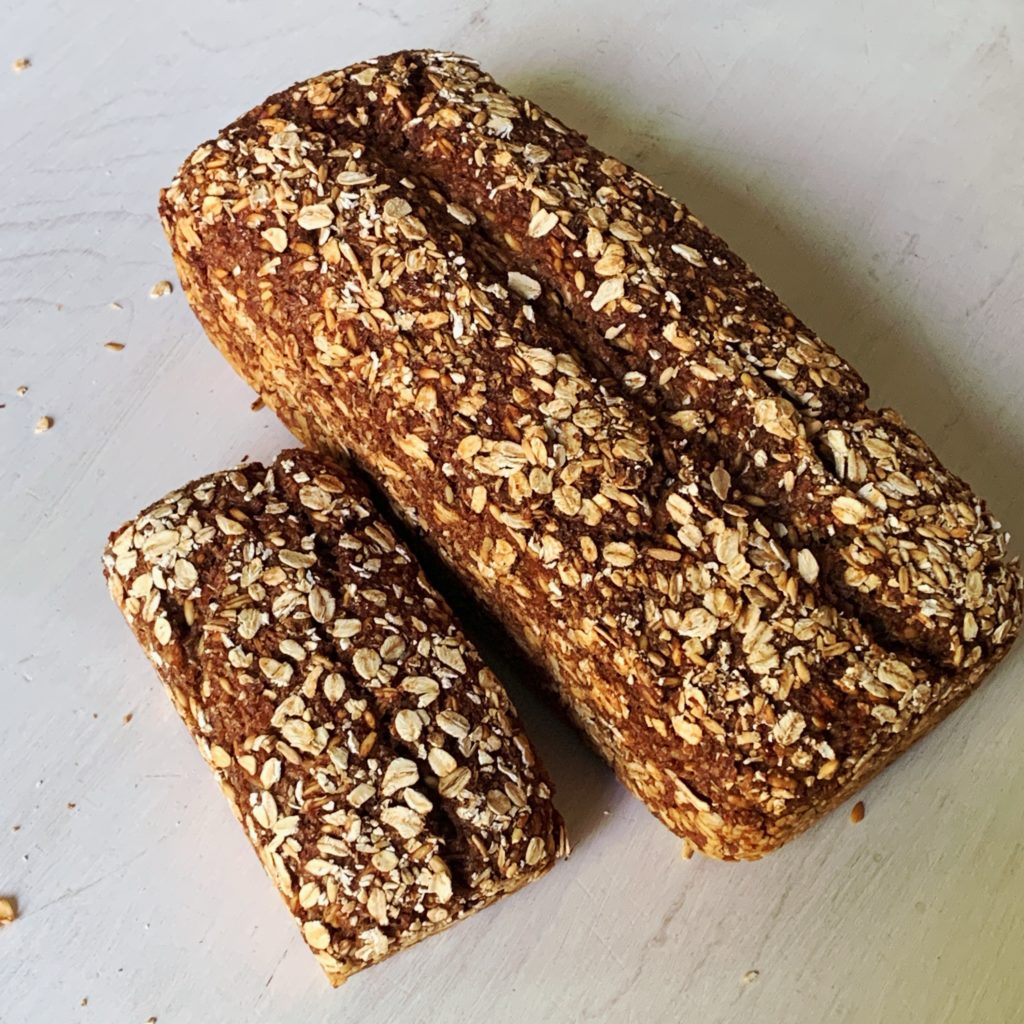
Shape the risen dough into a loaf with moistened hands and place in the greased loaf pan sprinkled with oat grains or oatmeal. I sometimes like to use a smaller one and a tiny one instead of a large pan. Then I have cute little slices of bread to make Smørrebrød bites, or as a side dish. Tiny breads are popular with kids anyway.
The dough should fill the mold or molds to 2 cm below the rim. On top sprinkle with oat grains or oat flakes. Once I have sliced the top of the bread before baking, which didn't turn out nice, it torn open while baking. So better let be.
Wait.
Now the dough pieces must rise for 2 - 2.5 hours until they stick out about 2 cm above the edge of the molds. If this is not yet the case, you just give them more time. In the summer it has happened to me that the dough piece needed less than 2 hours, so it is recommended to check every now and then.
Preheat the oven to 220°C, insert the bread, steam and turn the temperature down to 160°C. Bake for 140 minutes with steam.
Before cutting the Hamburg black bread should rest at least 24 hours. If you've also baked a mini loaf, as I sometimes do, the 24 hours is definitely enough. I like to give the large loaves even more time to set.
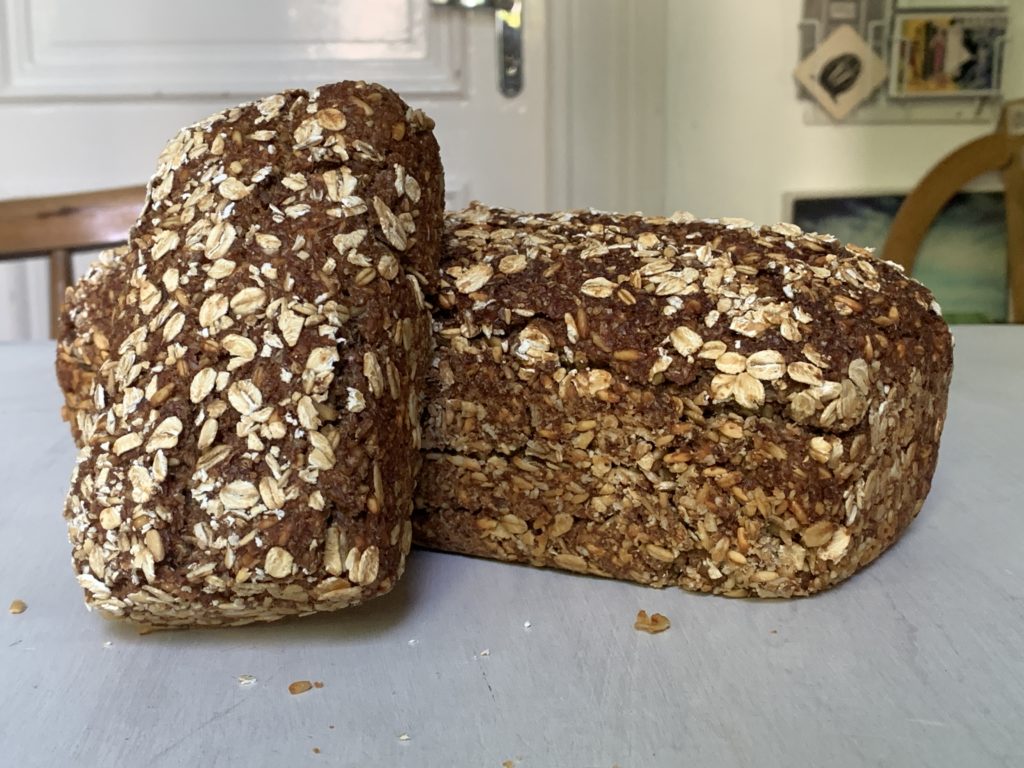
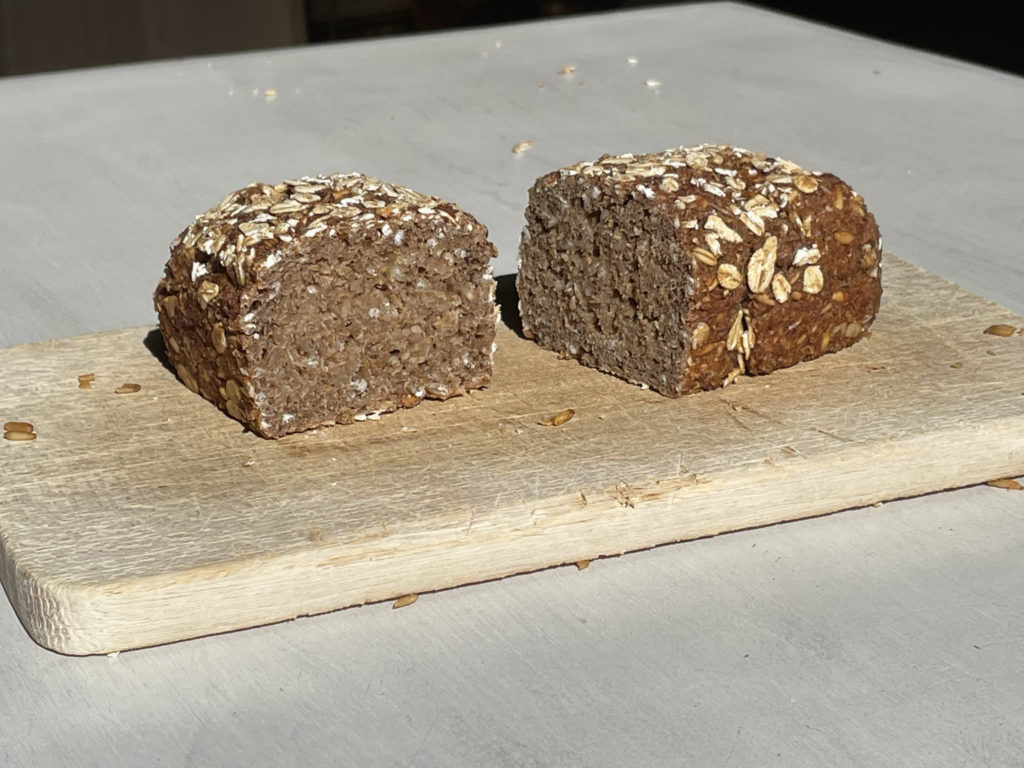
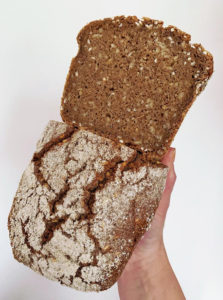
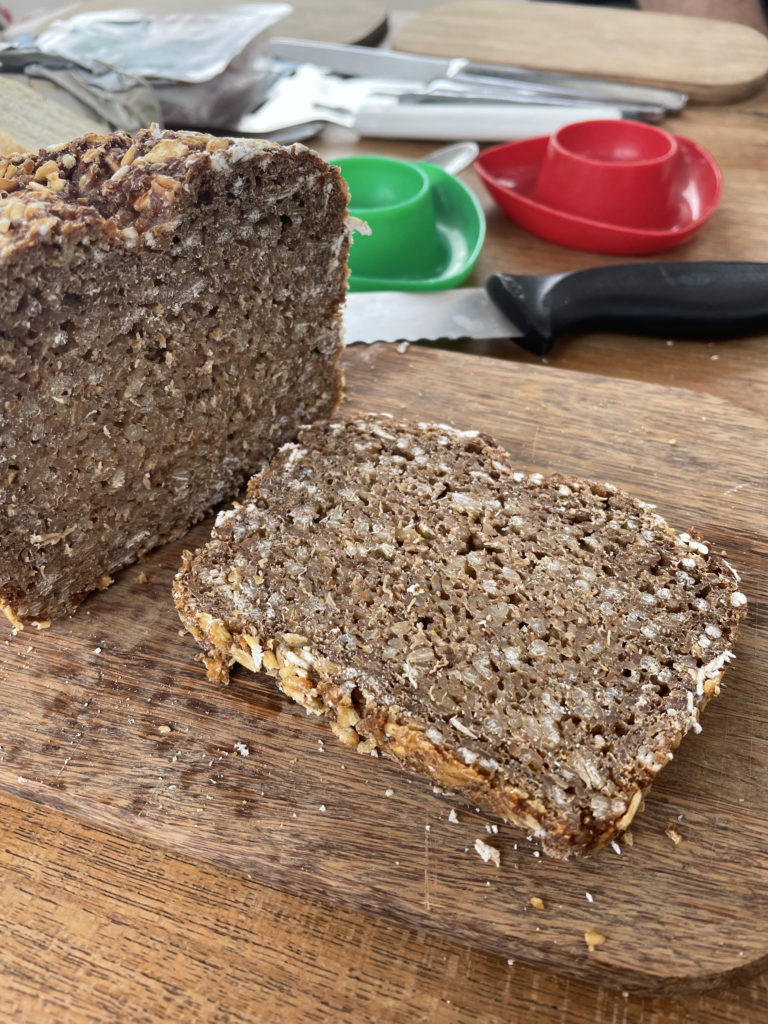
By the way, what is also really great about this bread is its shelf life. In 2021 I took a freshly baked bread on the boat on sailing vacation. We have not eaten every day of it, because the competition in some ports were fresh Birkes rolls and Håndværker Brød. I was all the more pleased to find that the bread, despite the heat and humidity, only in a paper bag in the cabinet, remained a whole three weeks not only edible, but very enjoyable.
Awesome, right?
Source
- hefe-und-mehr.de, Stefanie Herberth



I would like to make your black bread, but am confused as to using oat grains and rye groats. In USA, no flour? How does this hold together?
Hi DJ,
yes, that’s absolutely correct, this bread does not use any flour. Maybe I’m not on point with my vocabulary, but rye groats are more or less coarsely milled rye kernels, right? That’s all you need, the oat grains are just extra, because I love them. The long resting time helps the cohesion.
Try for yourself and be enthused! I need to mention that this bread is very German, though, meaning you really have to chew on it!
Happy baking,
Katsu
Hallo Katsu,
was meinst Du genau mit „Für 140 Minuten mit Dampf backen.“? Ich habe einen Backofen mit Dampfgarer, könnte das sogar machen, aber kenne das nicht. Normalerweise Bedampfe ich immer nur im ersten Moment des Broteinschiebens, danach ist es eigentlich nicht mehr notwendig.
Grüße,
Oli
Lieber Oli,
wahrscheinlich ist die Vokabel nicht ganz korrekt, ich bin ja Autodidaktin, was das Brot backen betrifft 😉 Ich bedampfe beim Einschieben und stelle ein Gefäss mit heissem Wasser mit in den Ofen beim Backen. So ist immer etwas Dampf in der Röhre.
Ich hoffe, das Brot gelingt und schmeckt Dir genau so gut, wie mir!
Viele Grüße,
Katsu
Liebe Katsu,
okay, soweit ich weiss ist das nicht notwendig, weil der Dampf von einem Gefäss im Backofen nicht beim Brot ankommt. Es ist die erste Phase, wenn das Brot in den Ofen geschoben wird, wo es eine hohe Luftfeuchtigkeit benötigt, um den Teig nochmals schnell aufgehen zu lassen, aber auch das habe ich nur vom Lutz Geißler. Mein Brot ist gelungen, auch wenn der Teig es beim letzten Gehen nur bis zum Rand und nicht darüber geschafft hat. Vermutlich war der Starter nicht „gut“ genug. Das Brot war noch recht feucht, vor allem am Boden, kurz nach der Entnahme aus dem Backofen. Aber nach der 24h-Ruhezeit war es schön fest (und knusprig) aussen. Also insgesamt ein tolles Brot, danke für das Rezept!
Hej Oli,
danke, wieder was gelernt! Dann kann man sich ja das Gefäss mit Wasser beim Backen sparen, das find ich ganz praktisch 🙂
Ich freue mich, dass das Brot gelungen ist und Dir auch so gut schmeckt!
Best regards,
Katsu
Ich backe schon ein bisschen länger und muss sagen, das stimmt nicht ganz. Den Schwaden am Anfang braucht man, um die Teighaut elastisch zu halten, damit sie beim Aufgehen an der Schnittstelle schön aufreißt und den Ofentrieb nicht behindert. 😉
Hej Katsu,
gelockt hat mich Deine Wehmut, da auch ich schon längere Zeit zwei hamburger Traditionsbroten hinterhertrauere, die ‚in Ehren altern konnten und mit den Tagen sogar aromatischer wurden.
Mut gemacht hat mir der Satz, dies Brot sei geduldig – Geduld brauchte es auch mit mir:
Mein Teig war zu feucht, um ihn zu formen. Ich mußte ihn mit einem Holzlöffel in die Form streichen. Er ging gut auf, fiel im Ofen jedoch sofort zusammen, drohte zu zerbrechen, als er auf’s Rost kam, war nach dem Backen knüppelhart und schwer. – Ich hatte mich schon gewappnet, tapfer einen Öko-klumpen in knäckedünnen Scheibchen zu ‚genießen‘, doch nach zwei Tagen Wartezeit ist es nun lecker und saftig. Die Silhouette könnte eleganter sein. Danke für Deine Recherche und die detaillierte Anleitung.
Nur eins habe ich mich nicht getraut: Ich hab für das Brühstück 300g Roggen genommen und den Hafer erst direkt vorm Kneten geschrotet. Ich war in Sorge, kurz zu überbrühen würde nicht ausreichen, die Fettoxidation der Haferkörner zu unterbinden. Klappt es wirklich ohne daß der Hafer gallebitter wird bei so langer Einweichzeit?
Lieben Gruß
Conny
Moin Conny,
wie schön, dass Dir das Brot gelungen ist. Wenn es Dir gut schmeckt, musst Du den Hafer ja nicht einweichen. Dass er bitter wird, ist mir noch nicht passiert. Soweit ich weiss, ist das bei Nackthafer auch nicht so üblich.
Dass Dein Brot so feucht war, erstaunt mich – aber solange das Ergebnis überzeugt, ist das ja in Ordnung. Vielleicht wird das Brot ja genau so, wie bei mir, wenn Du die Zutaten genau so benutzt 😉
Viel Freude weiterhin beim Backen.
Katsu
Hej Katsu,
gerade setze ich das sechste Brot an – bzw. das sechste und siebte, wegen der langen Kneterei und Backzeit. Es kommt sehr gut an in meiner Familie.
Beim ersten Mal war es wohl so feucht, weil der Hafer nicht mit über Nacht aufquellen konnte. Aber schön zu wissen, daß es einiges verzeiht, wenn es nur Zeit kriegt. Inzwischen wird es auch ‚hübsch‘. Und danke für den Tip mit den kleinen Formen. Die Kinder sind begeistert über ihre eigenen ‚Babybrote‘. Wir haben einen neuen Klassiker.
Lieben Gruß
Conny
Das freut mich riesig! Ja, die Kinderbrote sind sehr beliebt. Liebe Grüsse!
Liebe Katsu, danke für dieses wundervolle Rezept. Ich habe meinen Teigling aus Zeitgründen über Nacht im Kühlschrank garen lassen. Das hat ganz wunderbar funktioniert. Mein Brot ist einen Tag nach dem Backen innen noch etwas feucht, aber ich denke, dass sich das noch geben wird.
Bon appétit!
Hallo Katsu,
heute habe ich nach langer, geduldiger Wartezeit dieses Brot angeschnitten…..das Warten hat sich gelohnt,es schmeckt WELTKLASSE!!!! Ich backen seit Jahren mein Brot selber, mit eigenem Sauerteig, manchmal zur Unterstützung mit etwas Hefe oder selber gemachtem Kefir. Bei diesem Brot hat es nur den Sauerteig gebraucht….einfach köstlich 😀👍 Vielen Dank für dieses Rezept.
Liebe Caro,
genau so soll das sein!
Wie schön, dass es Dir gelungen ist und auch so gut schmeckt.
Katsu
Guten Tag Katsu, vielen Dank für das tolle Rezept. Es ist das zweite Mal, dass ich das Hamburger Schwarbrot backe, jetzt habe ich eine Portion in eine kleinere Kastenform gefüllt und den Rest in die normale große. Wie lange soll denn das kleinere Brot gebacken werden? Beim ersten Mal habe ich ein großes Brot nach Anweisung in 140 Minuten gebacken. Ich kann mir jedoch nicht vorstellen, dass das kleinere Brot auch 140 Minuten brauchen soll. Danke für die Antwort, herzliche Grüße von Erika
Hej Erika,
wie schön, dass es Dir schmeckt! Ich nehme das kleine Brot 45-60 Minuten eher raus. Du kannst es auch schon nach 24 Stunden anschneiden.
Viel Spaß beim Babybrotbacken,
Katsu
Das Brot ist der Knaller.
Ich bin absolut begeistert.
Mein Mann auch, die Nachbarn auch und die Freunde ebenfalls.
Danke für dieses tolle Rezept ❤️
Das freut mich sehr! Guten Appetit weiterhin <3
Hallo Katsu,
das Rezept ist an sich interessant, hat aber handwerkliche Mängel. Den Sauerteig muss man beim Gehen beobachten, wenn die Oberflächenspannung nachlässt, ist er schon zu weit. Je nach Triebkraft und Gärtemperatur kann das auch schon nach 10 Stunden so weit sein. Über die Dauer und Temperatur steuert man auch die Säure: je kühler/länger desto saurer. Die Triebkraft hat aber nichts mit der Säure zu tun, bevorzuge selbst einen sehr milden Sauerteig.
Ich tu mich auch schwer mit der Angabe „warmes Wasser“. Üblicherweise gibt man eine Temperatur an… da unterscheiden sich Rezepte teils auch deutlich: von 28 bis 45 Grad Wassertemperatur hab ich schon alles gelesen.
Das Warten bis zum Anschnitt hat folgenden Hintergrund: zum einen „backt“ das Brot noch „nach“ (verfestigt die Struktur), zum andern wandert der Geschmack von der Kruste in die Krume.
Bei einigen Rezepten wird das Brot 10 Minuten vor Backende aus der Form genommen, damit die Rinde nicht so klietschig wird. Nur so als Anregung. 😉
Hej Felix, das sind nützliche Tipps, damit kann bestimmt ein noch besseres Ergebnis erzielt werden. Wenn du dich sehr für Brot interessierst, gibt es geeignetere Seiten als meine, ich betreibe die Bäckerei für den Hausgebrauch. Wir lieben die Ergebnisse und genau das teile ich auf diesen Seiten 🙂