Bier ist super. Was soll ich sagen, den Stereotypen der bierliebenden Deutschen bediene ich voll und ganz. Und da Bier zudem noch ein fermentiertes Getränk ist, musste ich selbstverständlich lernen, ein anständiges Craft Beer selber zu brauen.
Warum solltest Du Craft Beer selber brauen?
Bier ist eines der ältesten Getränke der Menschheit und eigenes Bier zu brauen hat seit tausenden von Jahren Tradition. Das erste historisch nachgewiesene Gerstenbier stammt aus dem Iran im 5. Jahrtausend v. Chr. und wurde in der niedergeschriebenen Geschichte des alten Ägyptens und Mesopotamiens überliefert. Selber Bier brauen zu können ist ausserdem eine super Vorbereitung auf den Weltuntergang. Denn wenn die Apokalypse kommt, solltest Du wissen, wie man Alkohol herstellt, ganz klar!
Das Herstellen von Bier unterliegt in Deutschland der Steuerpflicht – zum Glück gibt es eine Ausnahme für das private Brauen von Bier. Bis 500 Liter darfst Du steuerfrei für den eigenen Verbrauch brauen, solange der Brauvorgang in Deinem Haushalt oder einem anderen, nicht-gewerblichen Brauhaus, stattfindet.
Ausserdem wirst Du Dir wahrscheinlich Zubehör zum Brauen von Craft Beer zuhause anschaffen. Was Du brauchst und was ich empfehle, habe ich in einem Artikel übersichtlich zusammengetragen. Und obwohl Du an Zutaten nur Wasser, Hopfen, Malz und Hefe brauchst, ist es gut, etwas mehr darüber vor dem Brauen zu wissen. Auch hierfür habe ich Dir alles anschaulich zusammengefasst und freue mich, wenn es nützt. Beide Links findest Du direkt hier.
Es ist ausserdem gute Sitte, zu jedem Brauvorgang ein Brauprotokoll anzufertigen. Wenn der Zoll mal fragen sollte, wieviel Du denn nun gebraut hast, hast Du auch gleich die Antwort parat. Du kannst Dir gerne meine Brauprotokoll-Vorlage runterladen, dann brauchst Du nicht alle Details selber aufzuschreiben. Notizen zur Verkostung mache ich mir immer auf der Rückseite des DIN á 4 Blattes.
Craft Beer selber brauen
Ich erkläre das Hintergrundwissen des Bierbrauens anhand des simplen Brauvorganges, mit dem ich selber zuhause obergäriges Bier braue. Nach dem Rezept habe ich auch mein erstes Bier selber gebraut und es ist immer noch eins meiner absoluten Lieblinge. Das Bierbrauen ist eine Welt für sich und bietet noch unendlich viel mehr, und wenn es Dich gepackt hat, kannst Du Dich auf unzähligen Seiten und in mannigfaltigen Foren informieren und austauschen. Die Fermentation Love Community kannst Du natürlich auch ansprechen, unten auf dieser Seite findest Du das Kommunikationsformular. Oder Du kommst direkt zu uns in die Facebook-Gruppe.
Und jetzt nichts wie los, Bier brauen lernen!
Rezept für Pale Ale
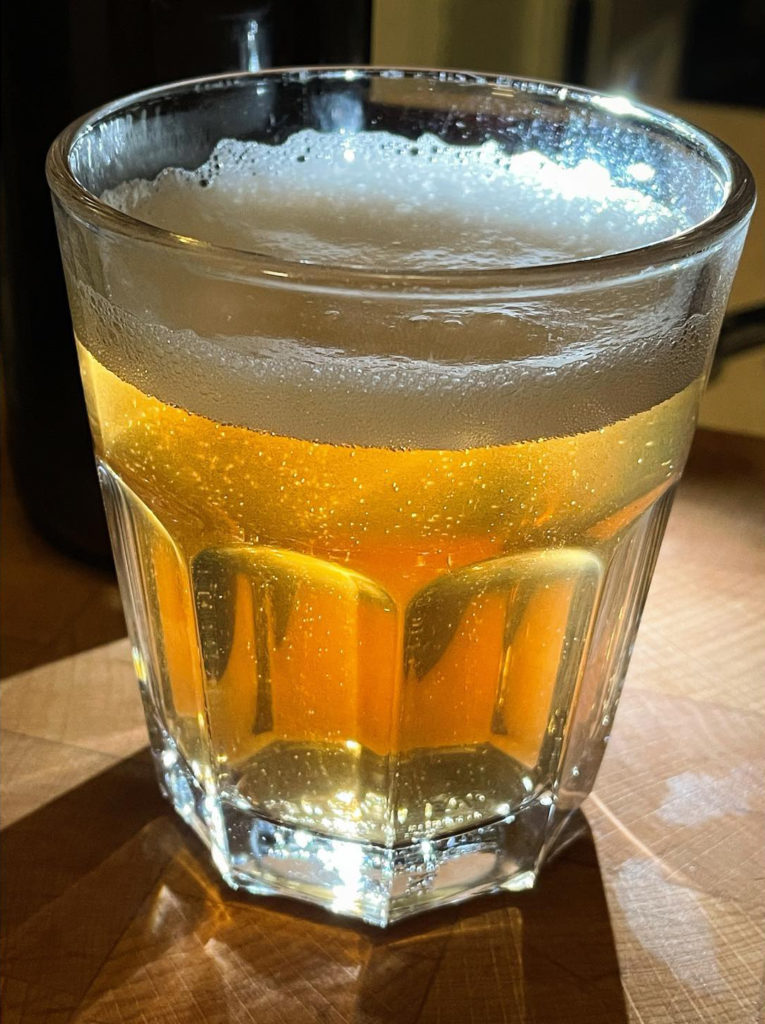
Pale Ale «Schmidts 0815»
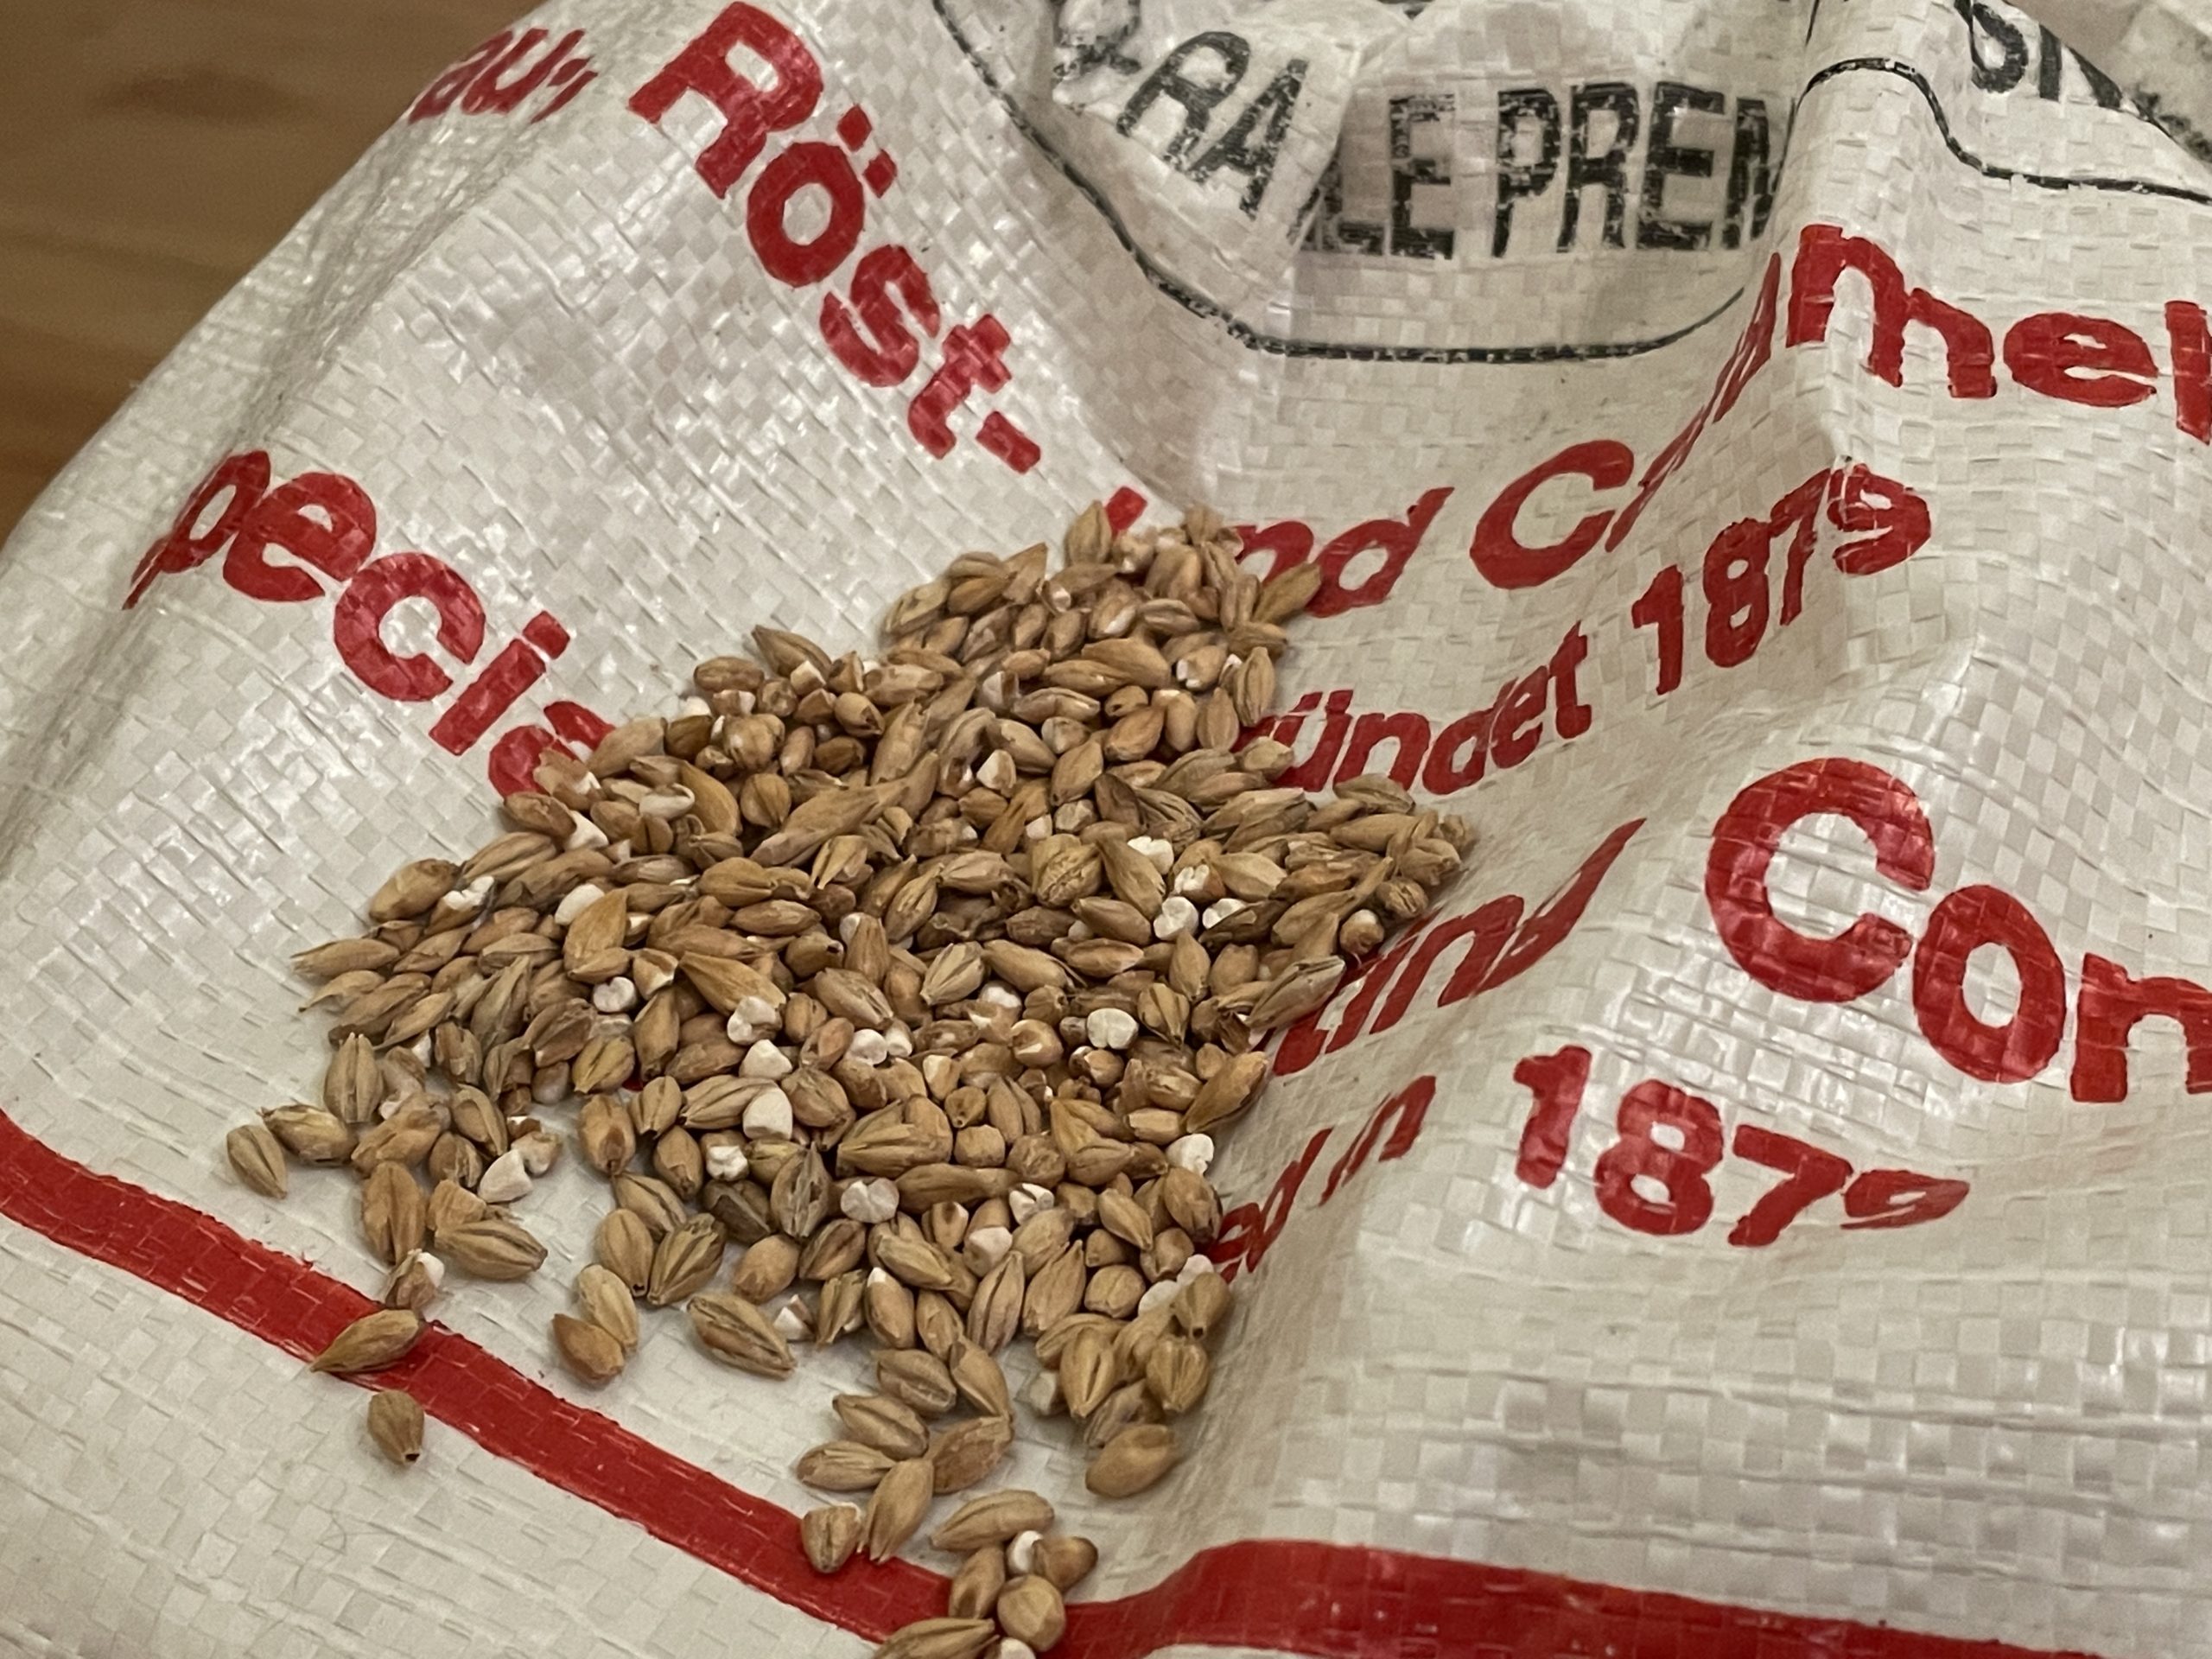
Lege alle Deine Zutaten zurecht, und wenn Du Dein Malz selber schrotest, dann ist das der erste Schritt am Brautag. Ansonsten beginnt das Bier brauen mit dem…
Maischen
Maischen ist das Vermengen und graduelle Erwärmen von geschrotetem Malz und Wasser. Die unlösliche Stärke aus dem Malz wird dabei zu löslichen und vergärbaren Zuckern umgewandelt, weil die während des Mälzens aktivierten Enzyme namens α- und β-Amylase wirken. Jedes Enzym braucht einen bestimmten Temperaturbereich, um die chemische Umwandlungswirkung entfalten zu können, weswegen man bei den jeweiligen Optimaltemperaturen Pausen, sogenannte Rasten, einlegt.
Kesselmaische
Die Kesselmaische ist das einfachste Brauverfahren, auch bei Craft Beer. Dabei gibt man beim Einmaischen geschrotetes Malz und Wasser (dieses Wasser nennt sich Hauptguss) in den Braukessel und heizt beides von Raststufe zu Raststufe weiter auf, idealerweise jede Minute um ein Grad. Weil ich einfach braue, halte ich keine Rasten ein, sondern braue auf nur einer Temperaturstufe. Es ist trotzdem wichtig, über die enzymatischen Reaktionen zu wissen, drum führe ich die üblichen Rasten kurz für Dich auf. Das sind die Eiweißrast bei 47-53° C, die Maltoserast bei ~63° C und die Verzuckerungsrast bei 72-73° C .
Eiweißrast
Bei ~50° C wird Eiweiß durch spezielle Enzyme namens Proteasen aufgespalten und zu kürzeren Peptiden und Aminosäuren abgebaut. Das Bier wird vollmundiger, haltbarer, und durch die Verringerung der Trübungsproteine klarer. Heutzutage kommen die meisten Malze schon mit gut gelösten Proteinen aus der Mälzerei in den Handel, so dass eine Eiweißrast sowieso nicht mehr nötig ist.
Maltoserast
Die Maltoserast, deren Optimaltemperatur bei 63° C liegt, ist verantwortlich für eine leichte, malzige Süsse und die Vollmundigkeit des Bieres. Die β-Amylasen bilden aus der Stärke des Getreides vergärbaren Zucker, die Maltose. Je länger diese Rast andauert, desto mehr vergärbare Zucker entstehen und desto trockener wird das Bier nach dem Fermentieren.
Verzuckerungsrast
Bei der Verzuckerungsrast bauen Enzyme namens α-Amylasen die übrige Stärke hauptsächlich zu nicht vergärbaren Dextrinen ab. Beim Maischprozess geht es darum, die ganze Stärke des Malzes aufzuspalten, ansonsten würde beim späteren Fermentieren Zucker fehlen und das Bier kann nicht richtig vergären. Das Ergebnis wäre ein trübes Gebräu, das schleimig oder mehlig schmeckt.
Kombirast bei Craft Beer
Wenn eine Maische über den gesamten Vorgang ungefähr dieselbe Temperatur hat, nennt sich das Kombirast. Dafür gibt man zum Einmaischen erst das geschrotete Malz in den Braukessel und schüttet unter ständigem Umrühren 74° C warmes Wasser auf. Durch das Vermengen des Wassers mit dem Malz fällt die Wassertemperatur, meistens auf genau 68° C, die gewünschte Temperatur für den gesamten Maischvorgang. Die Temperatur der Maische darf zu keinem Zeitpunkt über 80° C steigen, da sonst die Stärke nicht mehr gespalten werden kann.
Bei der Kesselmaische ist es übrigens wichtig, die Maische stetig umzurühren, da sie sonst anbrennen kann. Wenn Dein Braukessel kein Rührwerk hat, gibt es dafür spezielle Maischepaddel. Ein normaler Kochlöffel wäre wahrscheinlich zu klein.
Jodnormalität
Vor dem Aufheizen der Maische und dem daraus resultierenden Stoppen aller Verzuckerungsprozesse wird der Verzuckerungsgrad bestimmt. Die Maische muss jodnormal sein, das bedeutet, dass die vorhandene unlösliche Stärke aus dem Malz zu diesem Zeitpunkt in lösliche Zuckermoleküle umgewandelt ist. Um das zu überprüfen, kommt Brauer:innenjod (Jod N/50-Lösung / 1%ige Kaliumjoditlösung) für eine Jodprobe zum Einsatz.
Jodprobe durchführen
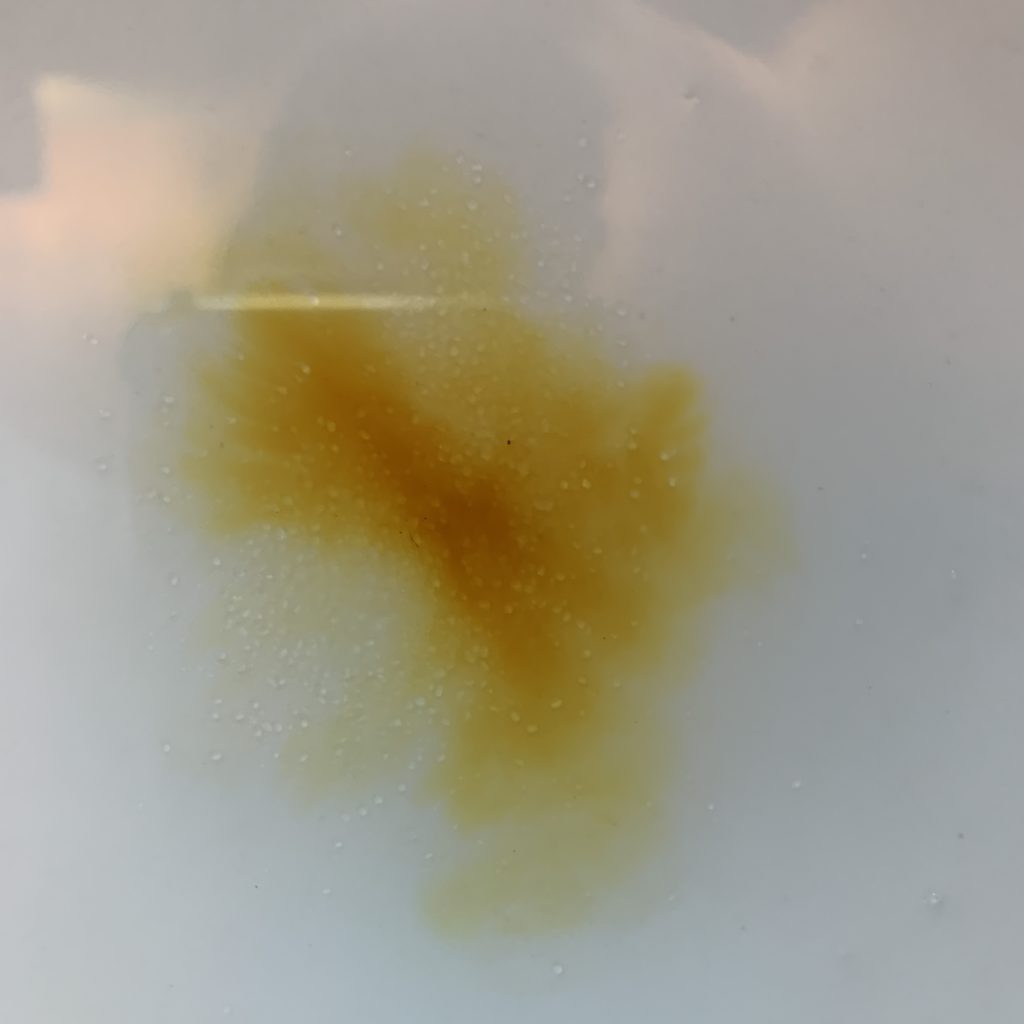
Für die Jodprobe gibt man 1 EL der Maische auf ein weisses Tellerchen oder einer Untertasse und fügt 1-2 Tropfen Jod dazu. Wenn sich die Probe schwarz-bläulich verfärbt, ist noch Stärke vorhanden, die Jodprobe gilt als positiv und die Jodnormalität ist nicht erreicht. Dann muss der Sud noch etwas länger bei 72° C gehalten werden, um die restliche Stärke verzuckern zu lassen.
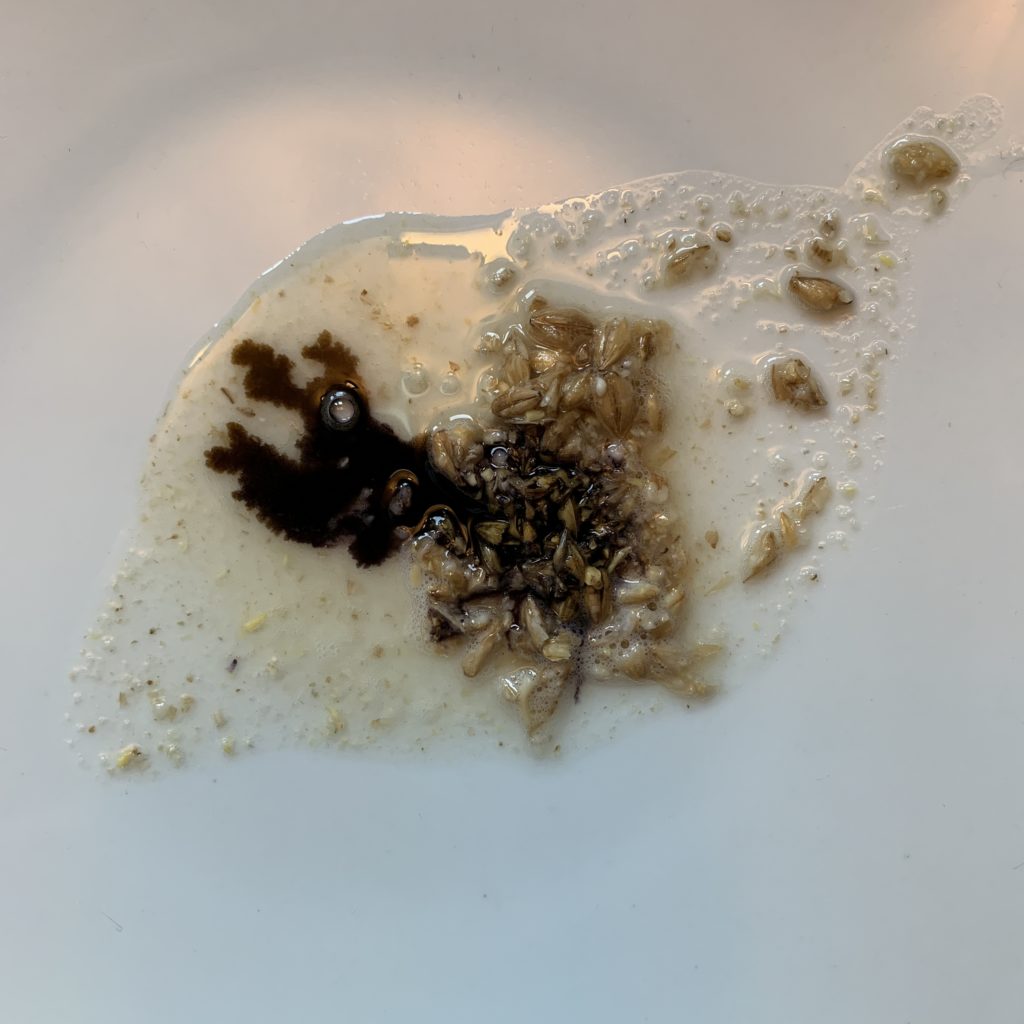
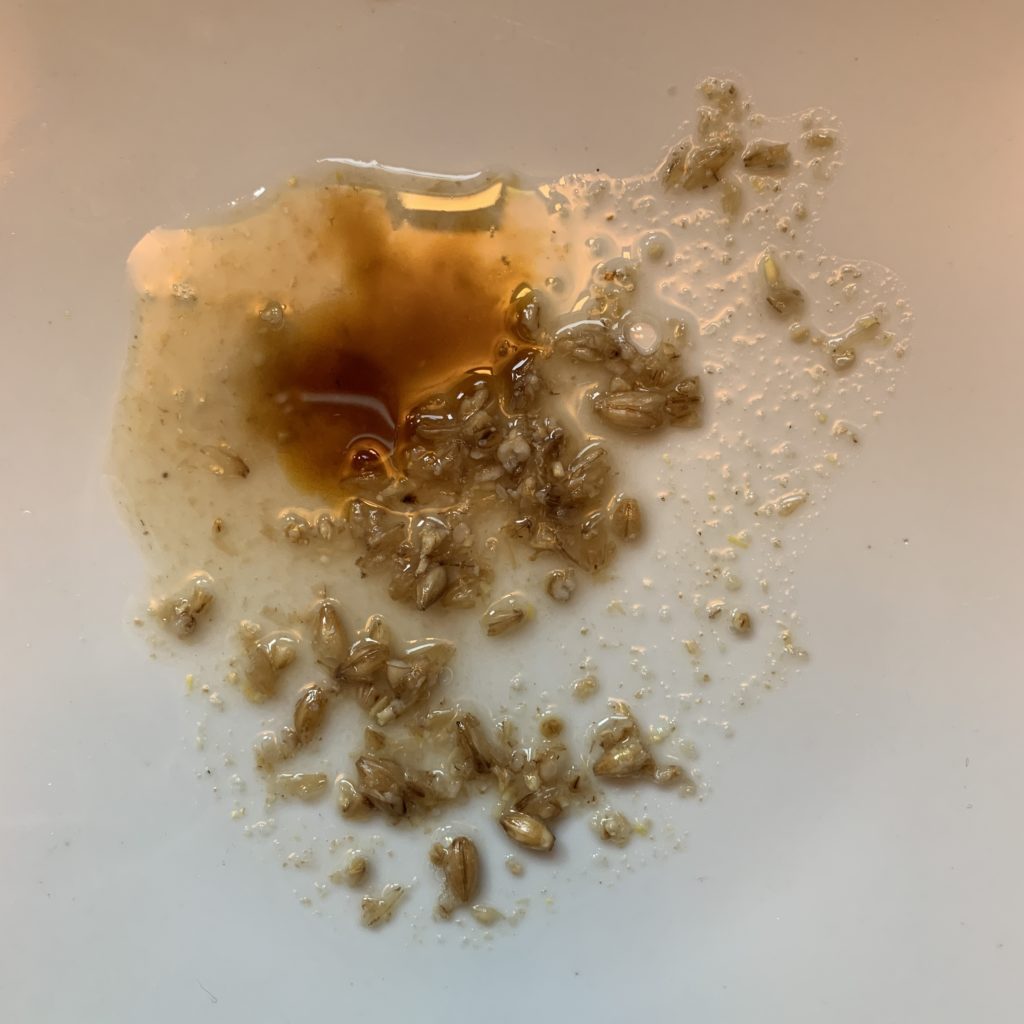
v.l.n.r. noch vorhandene Stärke, vollständige Verzuckerung, Jodnormalität erreicht
Sobald die Probe gelblich-orange bleibt, ist die Jodnormalität erreicht und es wird aufgeheizt. Die Jodprobe bitte entsorgen und nicht zurück in die Maische geben, Jod ist nicht zum Verzehr geeignet.
Läutern

Auf das Maischen folgt das Läutern, ein Filtervorgang, bei dem man die Spreu vom Weiz… äh, den Treber von der Würze trennt. Treber nennt man die mittlerweile verbrauchten, festen Malzbestandteile, und aus dem aromatischen, goldenen Brauwasser wird nach dem Abläutern die Würze gekocht.
Die Maische wird aus dem Braukessel in den Läuterbottich überführt. Beim Brauen zuhause sind Läuterbottich und Gäreimer häufig nicht nur das gleiche, sondern sogar das selbe Gerät. Zum Läutern wird einfach ein Läuterblech in den Eimer gelegt, und beim Gären wird er mit Deckel und Gärspund verschlossen. Effektiv und sparsam!
Nach dem Umfüllen wird die Läuterruhe eingehalten, damit sich die festen Treberbestandteile setzen und ein Filterbett ausbilden können. Nach ungefähr 20-30 Minuten wird abgeläutert. Dabei wird der Sud durch den Hahn mit einem Silikonschlauch aus dem Läuterbottich abgelassen. Zuerst ist die Vorderwürze, wie man die erste entstandene Flüssigkeit beim Läutern nennt, noch trübe. Mit einem Messbecher oder einem grossen Glas fängt man sie 5-6 Mal auf und gibt sie vorsichtig zurück in den Läuterbottich. Damit der Treber dabei nicht aufwirbelt und sich weitere Malzreste und Trübstoffe lösen, legt man einen Schwimmer oben auf die Flüssigkeit. Ich benutze dafür den Deckel einer grossen Vorratsdose aus Kunststoff. Du kannst aber auch den Rücken eines Schöpflöffels benutzen. Sobald der Sud klarer wird, kann man ihn direkt in den Braukessel laufen lassen.
Bevor der Treber im Läuterbottich trockenläuft, wird der Nachguss zugeschüttet, auch über den Schwimmer. Der Nachguss ist warmes Wasser und dient dazu, den noch im Treber vorhandenen Zucker anzuschwänzen, oder in anderen Worten: Durch Schwemmen herauszulösen, und gleichzeitig auf die gewünschte Menge an Flüssigkeit zu kommen. Es empfiehlt sich, die Würze langsam abzulassen, damit der Treber sich nicht verdichtet und verstopft.
Stammwürze bestimmen
Jetzt wird es Zeit, das erste Mal die Stammwürze des Bieres in Grad Plato zu bestimmen. Das Messen wird mit einer Bierspindel in einem schmalen, hohen Glas mit dem auf 20° C abgekühlten Sud durchgeführt. Gerade Anfänger:innen können ja noch nicht abschätzen, wieviel Flüssigkeit beim folgenden Würzekochen verdampft, wodurch die finale Stammwürze einen höheren Wert aufweisen wird.
Je höher die Stammwürze, desto mehr Alkohol wird das Bier entwickeln. Bis 7° P spricht man von Einfachbier, 7 – 11° P zeichnet Schankbier aus. Ich braue meistens Vollbier bei 11 – 16° P. Starkbier mit 16° P und mehr würde mir wahrscheinlich zu doll schädeln, so dass ich es noch nicht ausprobiert habe. Übrigens: Lieber am Anfang zu viel Plato, als später zu wenig. Verdünnen geht auch noch nach dem Würze kochen, brauchst halt mehr Flaschen zum Abfüllen.
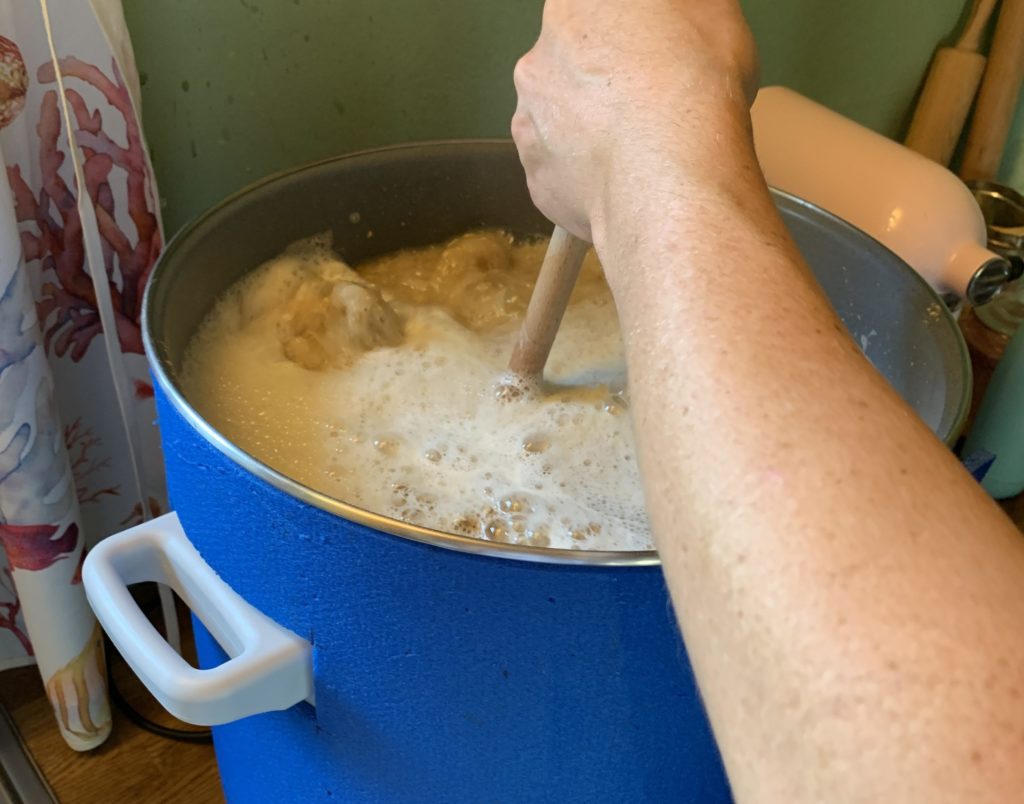
Würze kochen
Wenn der Braukessel voll ist, beginnt das Aufheizen, um die Würze zu kochen. Das Kochen der Würze entfernt unangenehme Aromastoffe, wie Dimethylsulfid oder Hexanal, die zu im Bier unerwünschten Geschmacknoten führen würden. Ausserdem gerinnen restliche Eiweißstoffe, die man als weisse Flocken auf der Würze sehen kann. Dieses Phänomen nennt man Würzebruch. Nicht zuletzt wird der Würze beim Kochen der Hopfen hinzugefügt, dessen Aromastoffe lösen sich durch das Kochen.
Es ist wichtig, dass die Würze sprudelnd kocht, damit die Eiweißstoffe gut verklumpen können. Ausserdem müssen die Dämpfe entweichen, damit störende Partikel abdampfen und nicht zurück in die Würze fallen, weswegen man die Würze ohne Deckel kocht. Ich habe gehört, dass manche Hobbybrauer:innen die Würze im Freien kochen, weil die Dampfentwicklung und der Geruch stört. Ich kann das nicht bestätigen, aber ich wohne ja auch im Altbau, da verdampft das wegen der hohen Decken und des Zugs eh…

Craft Beer hopfen
Ich benutze Hopfenpellets, die sind einfach zu handhaben. Irgendwann braue ich sicher auch mal ein grüngehopftes Bier, dann ergänze ich meine Erfahrungen an dieser Stelle. Das Hopfen der Würze geschieht in zwei Gaben. Die erste Hopfengabe, die Bitterhopfung kommt hinzu, sobald die Würze kocht. Durch die lange Kochzeit kann der Hopfen viel von seinen Bitterstoffen abgeben. Seine Aromen hingegen verfliegen, weshalb Du für die Bitterhopfung einen eher preisgünstigen Hopfen benutzen kannst. Der Aromahopfen, die zweite Hopfengabe, wird gegen Ende der Kochzeit hinzugefügt. Er verleiht dem Bier sein Bouquet und Hopfenaroma, so dass hierfür häufig besonders aromatische Hopfensorten zum Einsatz kommen. Aromahopfen und Craft Beer gehen Hand in Hand.
Direkt nach der Aromahopfung ist ein guter Zeitpunkt, den Gäreimer und das weitere Zubehör (Hahn, Gärstopfen, Silikonschlauch, Hopfenfilter) durch Auskochen zu sterilisieren. Gegen Schluss der 90-minütigen Kochzeit muss die Würze nicht mehr sprudelnd kochen, Du kannst die Temperatur also runterdrehen und die Restwärme nutzen.
Whirlpool
Wenn der Kochvorgang beendet ist und sich die Oberfläche der Würze beruhigt hat, ist es Zeit für den Whirlpool. Der Whirlpool entsteht, indem man mit dem Maischepaddel oder einem langen Löffel einen Strudel im Braukessel rührt. Er dient dazu, den Eiweissbruch und die Reste der Hopfenpellets zu einem Kegel in der Mitte des Kessels zusammenzuführen, damit dieser sogenannte Trub beim Abschlauchen nicht den Hahn verstopft.
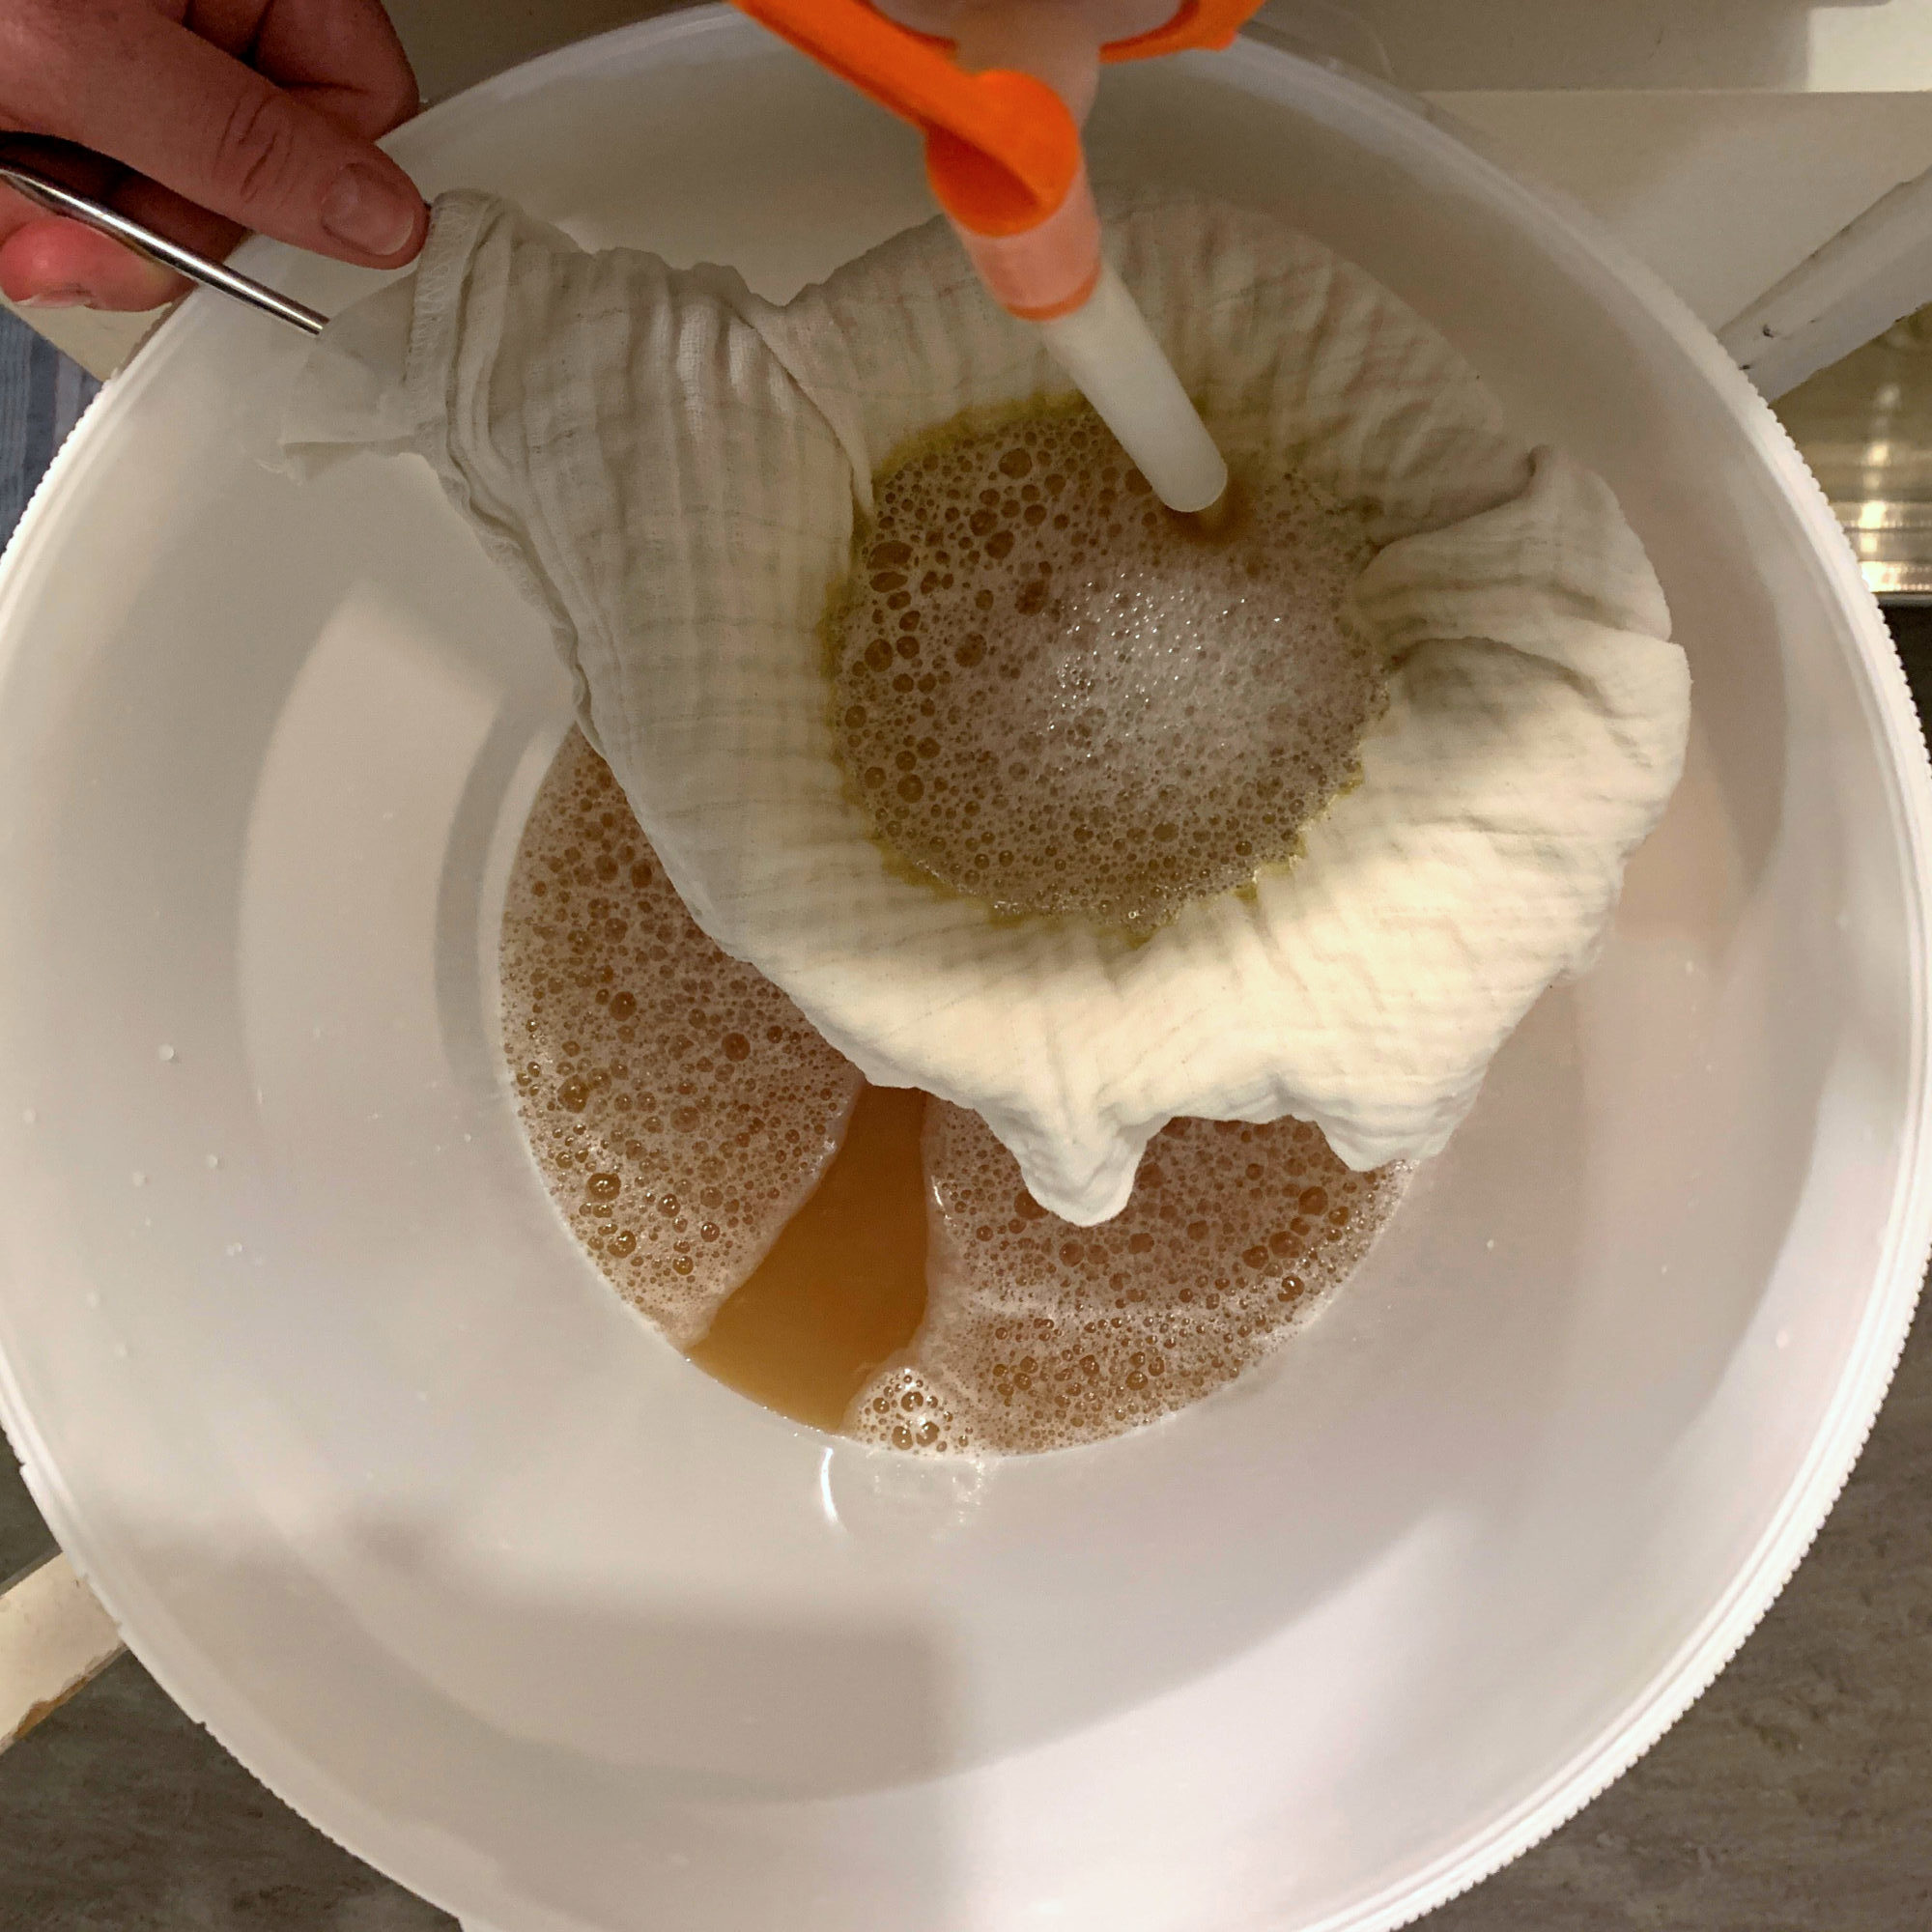
Abschlauchen
Nach dem Whirlpool wartet man, bis sich die Würze erneut beruhigt hat, und beginnt dann das Abschlauchen in das Gärgefäss. Hierbei ist es wichtig, sauber zu arbeiten, die gesamte Ausrüstung muss also steril sein. Die Rückstände, Würzebruch und Hopfenreste, filterst Du dabei heraus, die haben im späteren Bier nichts zu suchen. Ich habe mir dafür einen Hopfenfilter angeschafft, weil mir das Hantieren mit Sieb und Käsetuch zu umständlich war.
Jetzt wird erneut die Stammwürze bestimmt. Dafür wird etwas Würze abgenommen und auf 20° C gekühlt. Die exakte Temperatur ist wichtig, um später den Alkoholgehalt besser ausrechnen zu können. Wenn Dir der Wert zu hoch ist, kannst Du die Würze einfach mit Wasser verdünnen.
Den Gärbehälter verschliessen und den Sud abkühlen lassen. Je schneller das vonstatten geht, desto besser. Im Winter kannst Du den Gärbehälter einfach ein paar Stunden vor die Tür stellen. Üblich ist das Abkühlen über Nacht, und auch der Zeitrahmen ist noch total in Ordnung.
Hefegabe

Erst, wenn der Sud auf 20 – 24° C abgekühlt ist, kannst Du die Hefe dazugeben, bei höheren Temperaturen überlebt sie nicht. Die Hefe ist nötig, damit aus dem Zucker Alkohol entsteht. Bitte benutze explizit Hefe, die zum Bierbrauen geeignet ist, und keine simple Bäcker:innenhefe. Obwohl beide Hefen Pilze der Gattung Saccharomyces, Spezies Cerevisiae, sind, unterscheiden sie sich in den Subspezies. Brot backen mit Bierhefe ist möglich, die Umkehr jedoch nicht empfehlenswert.
Der Erfolg Deines Bieres hängt auch von der benutzen Hefe ab.
Da ich Trockenhefe benutze, die gut lagerfähig ist und beste Ergebnisse liefert, muss ich ihr nach dem Einstreuen in das Gärgefäss Zeit zum Rehydrieren lassen. Nach einer halben Stunde ist sie dann so weit, dass ich sie lüften kann, um den Gärprozess zu starten. Dafür schöpfe ich mit einer abgekochten, sterilen Suppenkelle mehrere Male den Sud inklusive der Hefe an die Luft und rühre es dann wieder unter.
Gärung
Danach das Gärgefäss gut verschliessen und mit einem Gärröhrchen versehen, aus dem die entstehende Kohlensäure entweichen kann. Keine Sorge, Dein Bier wird trotzdem nicht schal werden, das Karbonisieren folgt später. Die erste Gärung sorgt für den Alkoholgehalt. Die ideale Temperatur für obergäriges Bier ist zwischen 19° C – 22°C. Das Bier schmeckt ausserdem später besser, wenn es im Dunklen fermentiert.
Nach ungefähr 5 Stunden beginnt die Hefe schon, zu arbeiten und Du kannst im Gärstopfen das Geblubber beobachten. Damit das Bier nicht verdirbt, lasse das Gärgefäss bitte geschlossen und überwache die Vergärung des Jungbiers über die Aktivität im Gärröhrchen und das Bestimmen des Restextraktes. Dafür zapfst Du mithilfe einer Bierspindel alle 2-3 Tage etwas Jungbier und liest die Restwürze in Grad Plato ab. Für die spätere Alkoholgehaltberechnung sollte das Jungbier bei den Messungen 20° C haben. Sobald sich die Gradzahl zwischen zwei Messungen nicht mehr verändert, ist die Alkoholgärung abgeschlossen.
Kalthopfung
Kalthopfung, auch Hopfenstopfen genannt, ist eine Hopfengabe, die erst nach der Hauptgärung erfolgt. Der mittlerweile entstanden Alkohol extrahiert die ätherischen Öle besonders gut, und aufgrund der niedrigeren Temperaturen, als beim Würze kochen, lösen sich nicht so viele Bitterstoffe.
Beim Trend Craft Beer ist das Kalthopfen wohl die entscheidendste Massnahme, um dem Bier spezielle Geschmacksnuancen hinzuzufügen. Wenn Du ein Indian Pale Ale braust, wirst Du auf jeden Fall Kalthopfen, damit die Zitrusnoten in den Vordergrund treten, die so prägnant für IPAs sind. Wie viel Hopfen Du bei der Kalthopfung hinzugibst, hängt vom gewünschten Aroma und dem Anteil an ätherischen Ölen ab. Solange Du noch Erfahrungen sammelst, hältst Du Dich am besten an bewährte Rezepte.
Ich benutze auch zum Hopfenstopfen Pellets, die ich einfach am Ende der Gärung zum Jungbier in das Gärgefäss gebe. Du kannst auch Hopfendolden in einem Sack benutzen. In beiden Fällen setzen sich Hopfenreste auf dem Gefässboden ab, weswegen man vor der Abfüllung Hopfengestopftes Bier noch einmal Umschlauchen und Filtern muss.


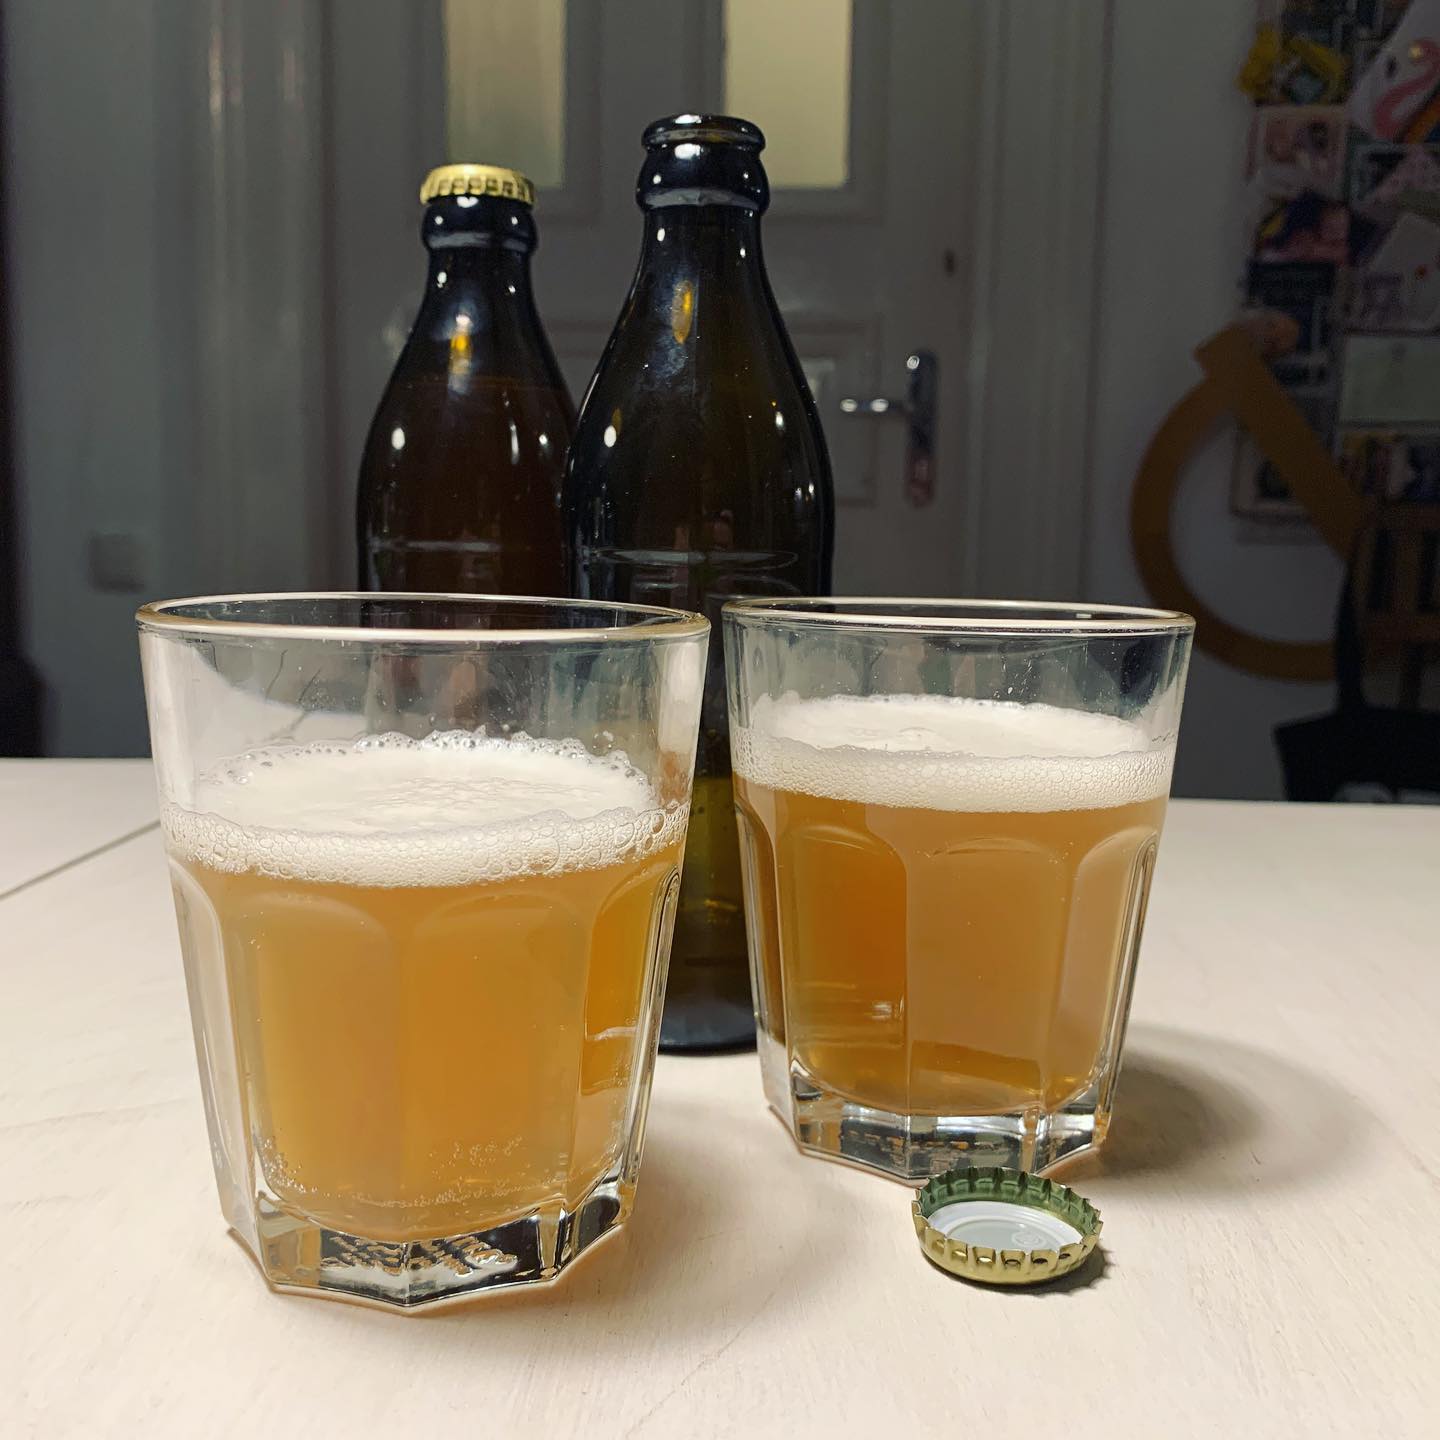
Flaschengärung: Abfüllen und Karbonisieren von Craft Beer
Das Jungbier wird in Flaschen abgefüllt, sobald es nicht mehr gärt. Dass Du keine Aktivität im Gärröhrchen mehr beobachtest, ist kein sicherer Hinweis darauf, dass die Gärung zu Ende ist, Sicherheit bietet nur die Bestimmung des Restextraktes. Solltest Du kein Messgerät zur Bestimmung des Restextraktes zuhause haben, solltest Du das Bier nicht vor Ablauf von 2-3 Wochen abfüllen, wenn die Hefe die Zucker zu Alkohol umgewandelt hat. Um zu verhindern, dass Bierflaschen explodieren und Schaden anrichten, empfehle ich stark die Investition in eine Bierspindel. Bei fermentierten Getränken geht Sicherheit vor.
Weil bei der Gärung im Gärgefäss durch das Gärröhrchen die Kohlensäure entwichen ist, muss das Bier karbonisiert werden. Dafür wird dem Jungbier Zucker zugefügt, den die Hefe in den Flaschen zu Kohlensäure transformieren kann.
Wenn Du Dein Bier kaltgehopft hast, musst Du es vor dem Zuckern und Abfüllen Umschlauchen, um die Hopfenreste rauszufiltern. Das Umschlauchen hat ausserdem den Vorteil, dass der Hefesatz zurückbleibt.
Karbonisierung mit Zucker
Beim Bierbrauen zuhause ist es am einfachsten, Kohlensäure durch die Zugabe von Zucker zu generieren. Bei gekauftem Bier darf das, zumindest in Bayern, aufgrund des Reinheitsgebotes überhaupt nicht gemacht werden. In Deutschland ausserhalb Bayerns ist zum Kanrbonisieren von obergärigen Bier die Verwendung von technisch reinem Roh-, Rüben- und Invertzucker, Stärkezucker und sogar aus Zucker hergestellten Farbmitteln zulässig. Gewerbliche Brauer:innen Karbonisieren jedoch meistens mit Speise, einem unvergorenen Teil der Würze.
Je nach gewünschter Kohlensäureintensität rechnet man 6-8 Gramm Zucker pro Liter Bier. Mehr Zucker bedeutet mehr Futter für die Hefe und somit mehr resultierende Karbonisierung. Ich gebe nicht mehr als 6 Gramm zu und hatte trotzdem schon sehr spritzige Biere. Mehr als 8 Gramm Zucker pro Liter empfehle ich persönlich nicht. Wenn zuviel Kohlensäure entsteht, baut sich Druck auf, und die Flaschen können im schlimmsten Fall platzen. Im besten Fall hast Du nach dem Öffnen einfach nur eine Bierfontäne im Gesicht.
Der Zucker wird in warmem Wasser gelöst, zum Jungbier gegeben und gut untergemischt, dann kann die Abfüllung beginnen.
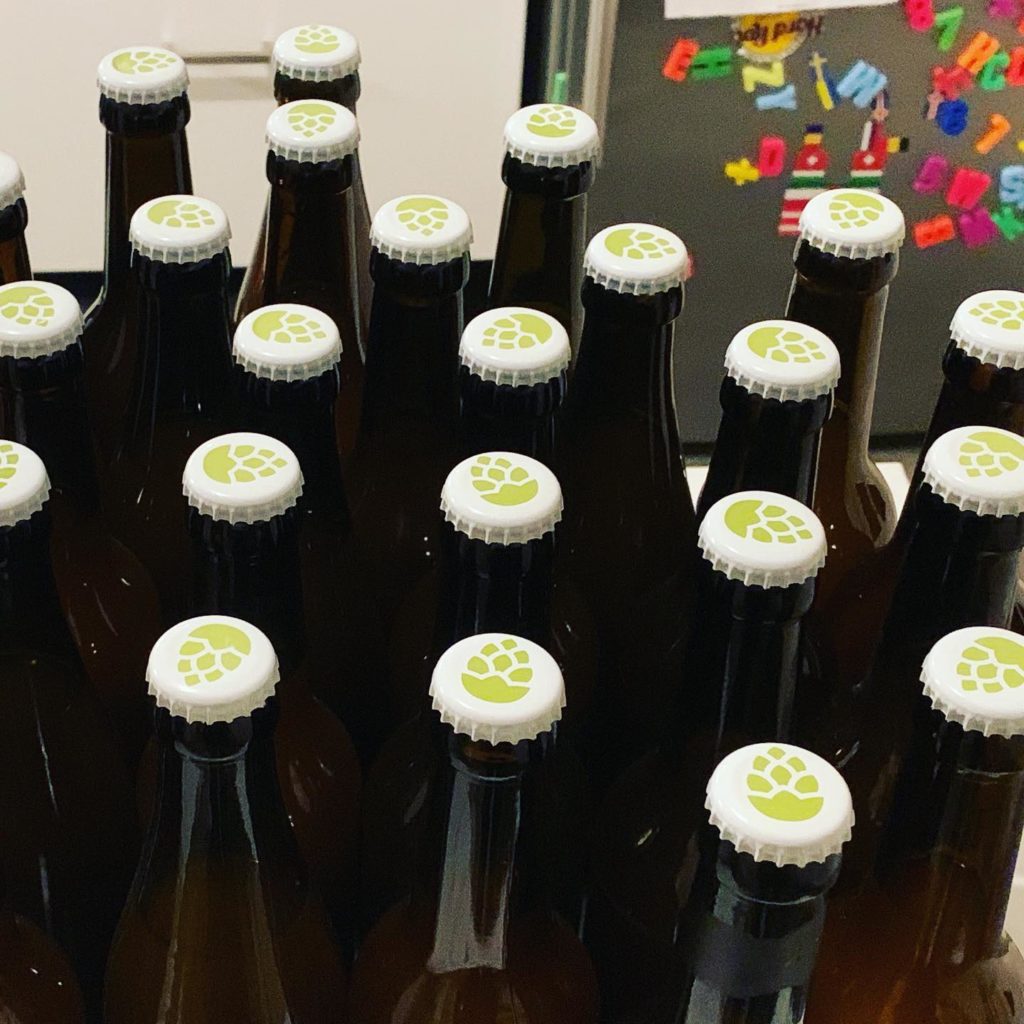
Abfüllung Deines Craft Beers
Ein Abfüllröhrchen leistet hier sehr gute Dienste und ist schon für wenig Geld zu bekommen. Wenn Du Dich für Bügelflaschen entschieden hast, musst Du nur den Bügelverschluss aufsetzen. Bei Flaschen mit Kronkorken hast Du ein bisschen mehr Arbeit, weil jede Flasche individuell verkorkt werden muss. Ich bevorzuge Kronkorkenflaschen und schreibe mir die jeweilige Farbe der Verschlüsse mit ins Brauprotokoll. Dann brauche ich keine Etiketten oder andere Lösungen, um die Art des Bieres zu markieren.
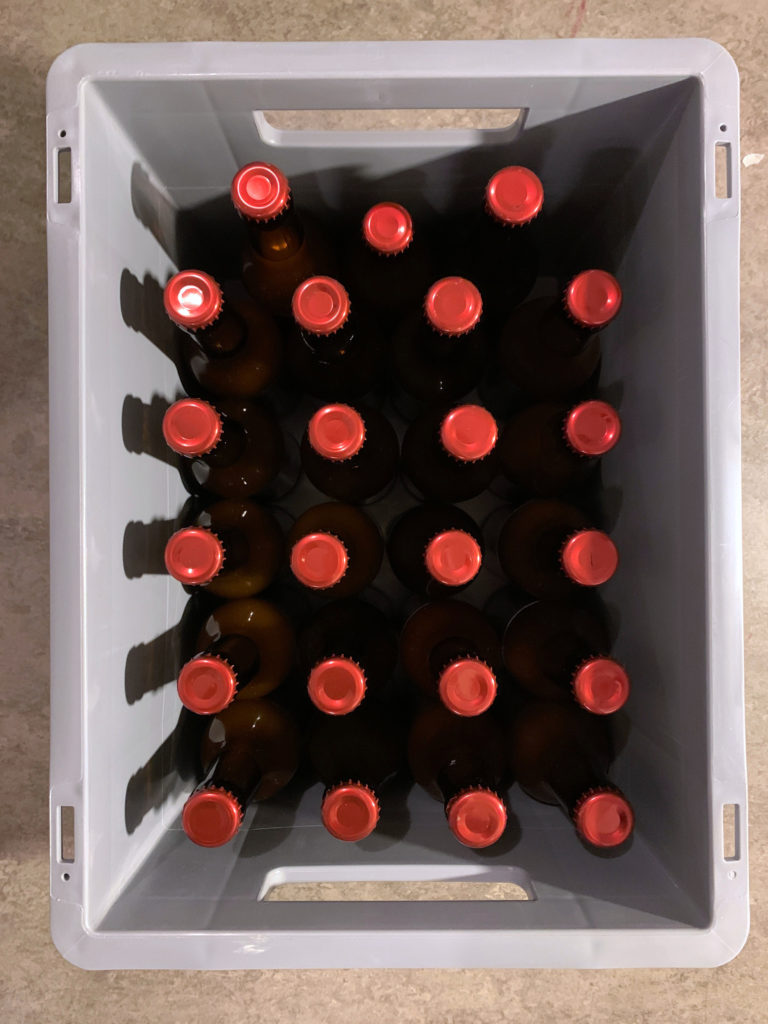
Bier gärt am besten kühl und im Dunklen, also benutze möglichst braune Flaschen, die Du zudem noch in einer Kiste oder Ecke im Keller ohne Lichteinfall aufstellst. Der Geschmack verändert sich durch Lichteinfall, und zwar nicht zum Besseren. Probiere es gerne mal mit einer Flasche aus, Du wirst den Unterschied schmecken.
Wann das Bier Dir fertig ist und am besten schmeckt, entscheidest Du selber. Das erste Mal probieren kannst Du in der 3. Woche.
Da deus fortunae!